ServiceNow integration
ServiceNow is a flexible online platform that helps customers transform their digital workflows. One of the ways it can be used is to help IT departments with incident management.
In this tutorial, we are going to show you how to create a webhook receiver (as a Scripted REST API) inside of ServiceNow, and how to set up Advanced Webhooks in your BlazeMeter API Monitoring account to send test result notifications to ServiceNow to automatically create incidents in case of an API failure.
- Requirements
- Creating a scripted REST API in ServiceNow
- Sending BlazeMeter API Monitoring notifications to ServiceNow via advanced webhooks
- Testing our integration
Requirements
- A BlazeMeter account
- Advanced Webhooks integration enabled (go to your Connected Services page, and search for "Advanced Webhooks". If you don't find it, please reach out to Support)
- ServiceNow account (you can create a free developer account here)
Creating a scripted REST API in ServiceNow
Follow these steps:
- Log in to your ServiceNow account.
- On the left-hand side search box, type Scripted REST. Under System Web Services, Scripted Web Services, click Scripted REST APIs.

- Click New to create a new API service.

- Name your API and an API ID (we use API Monitoring Webhooks for our example). You can leave Protection Policy as -- None --.
- Click Submit.

- You are taken back to the list of Scripted Web Services. Search for the API we just created and click it.
- Scroll down to the Resources tab and click New.

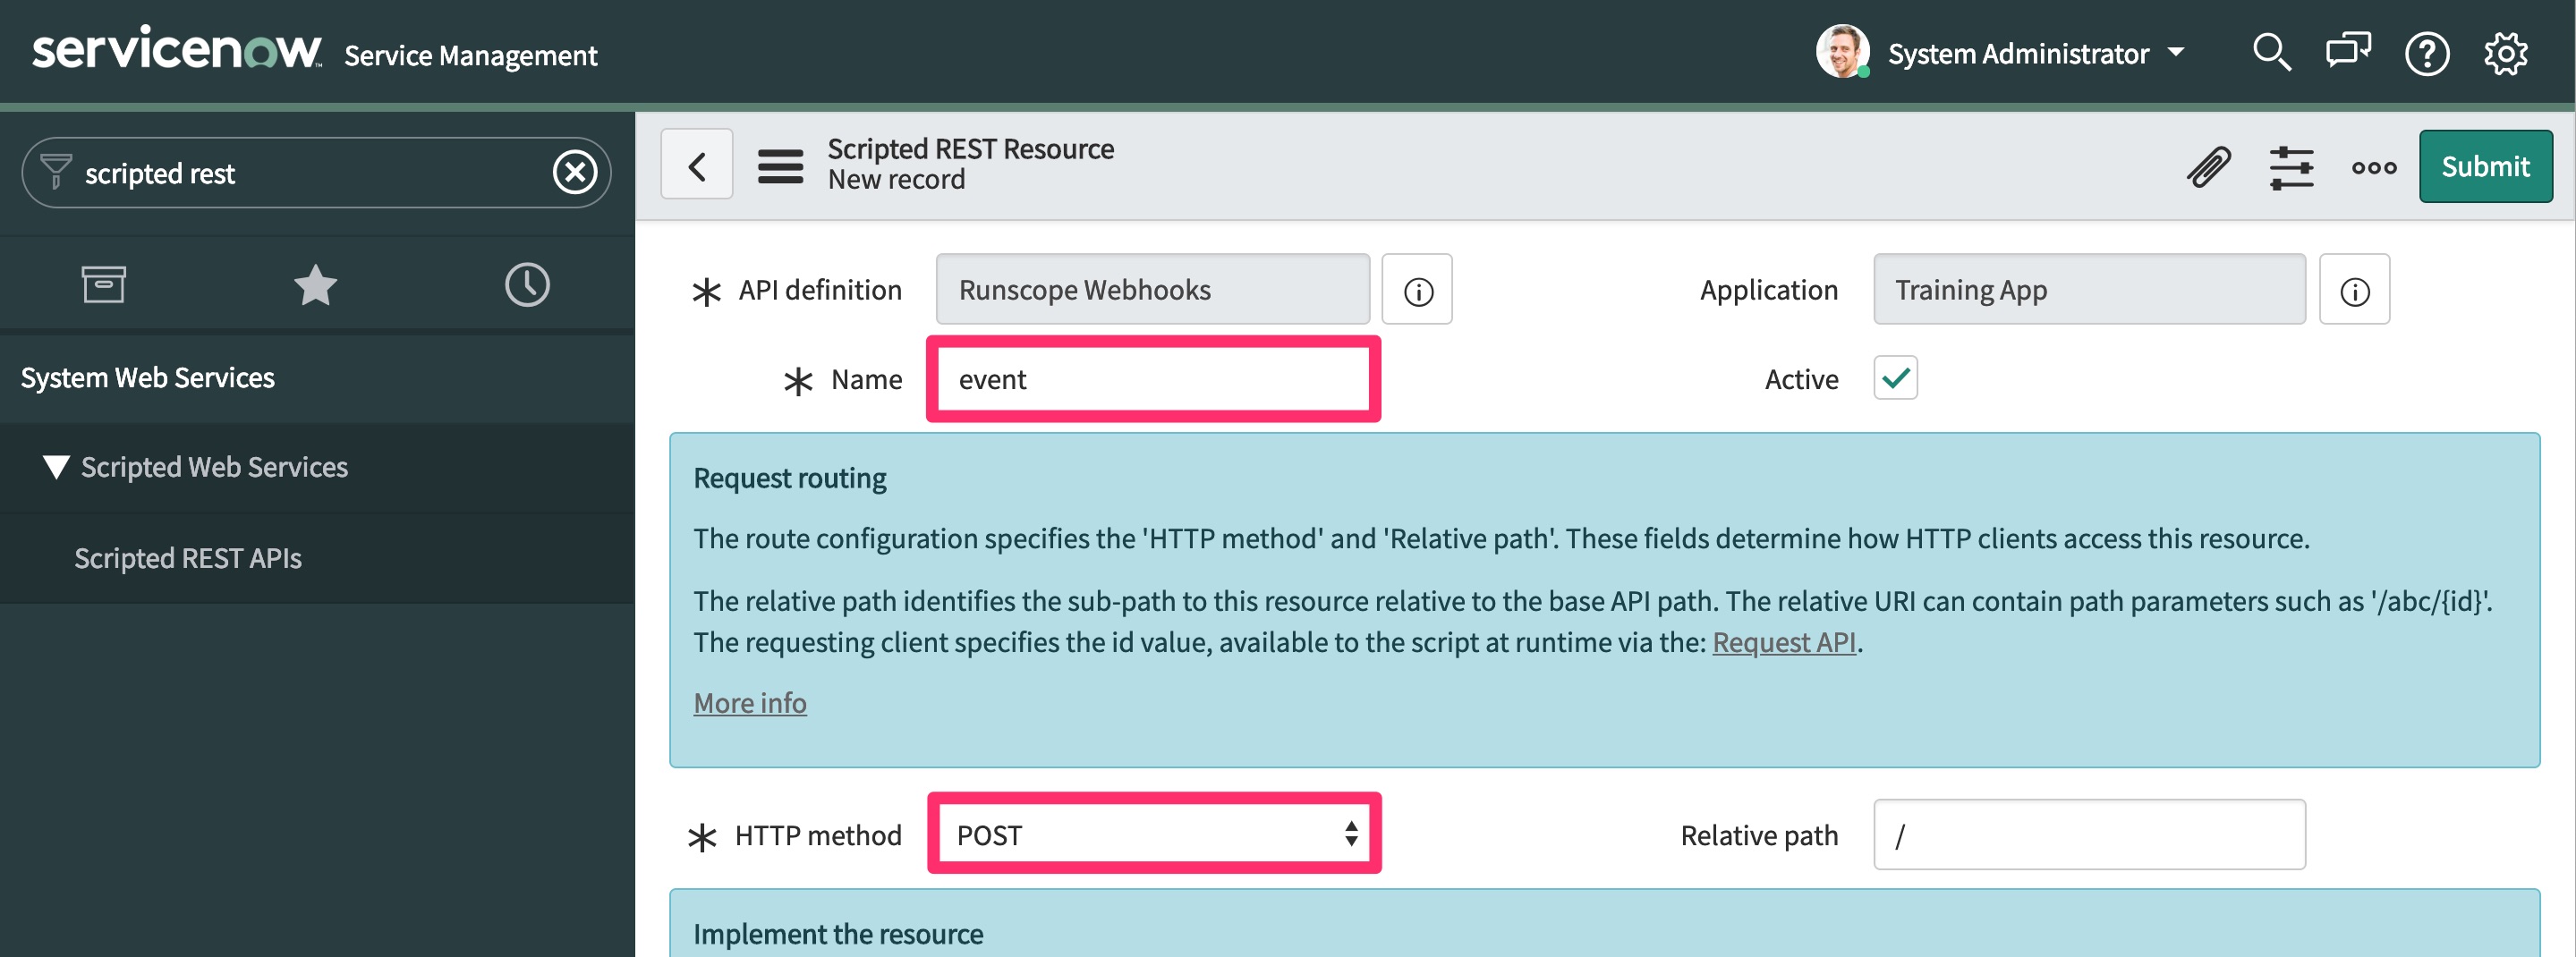
- Name your resource (we use event) and change the HTTP method to POST.
- Scroll down to the Script section and add the following snippet.
(function process(/*RESTAPIRequest*/ request, /*RESTAPIResponse*/ response) {
  var apiKey = request.queryParams['apiKey'];
  var secret = "<secret>";
  if (apiKey == secret) {
    var event = request.body.data;
    var inc = new GlideRecord('incident');
    inc.initialize();
    var short_description = "Runscope Webhook - ";
    short_description += event.test_name;
    inc.short_description = short_description;
    inc.description = event.bucket_name + " - " + event.test_name;
    inc.work_notes = "Test run URL: " + event.test_run_url;
    inc.number = event.test_run_id;
    inc.state = 1;
    inc.impact = 2;
    inc.urgency = 2;
    inc.priority = 2;
    // optional - specific person to assign the incident to
    // inc.assigned_to = "<email>";
    inc.assignment_group.setDisplayValue("<group>");
    var comments = "Runscope Test URL: " + event.test_url;
    comments += "\nRunscope Test Run URL: " + event.test_run_url;
    inc.comments = comments;
    inc.insert();
  } else {
    gs.warn("Invalid API Key for Runscope Webhook");
  }
  // Runscope expects a 200 status code response back
  response.setStatus(200);
})(request, response);
There are three variables in the script that you need to update:- <secret> - required - a random string, such as a UID. Save this value as we'll use it later when setting up the BlazeMeter API Monitoring webhook.
- <group> - required - the group that you want to assign the incident to.
- <email> - optional - the specific person to assign the incident to.
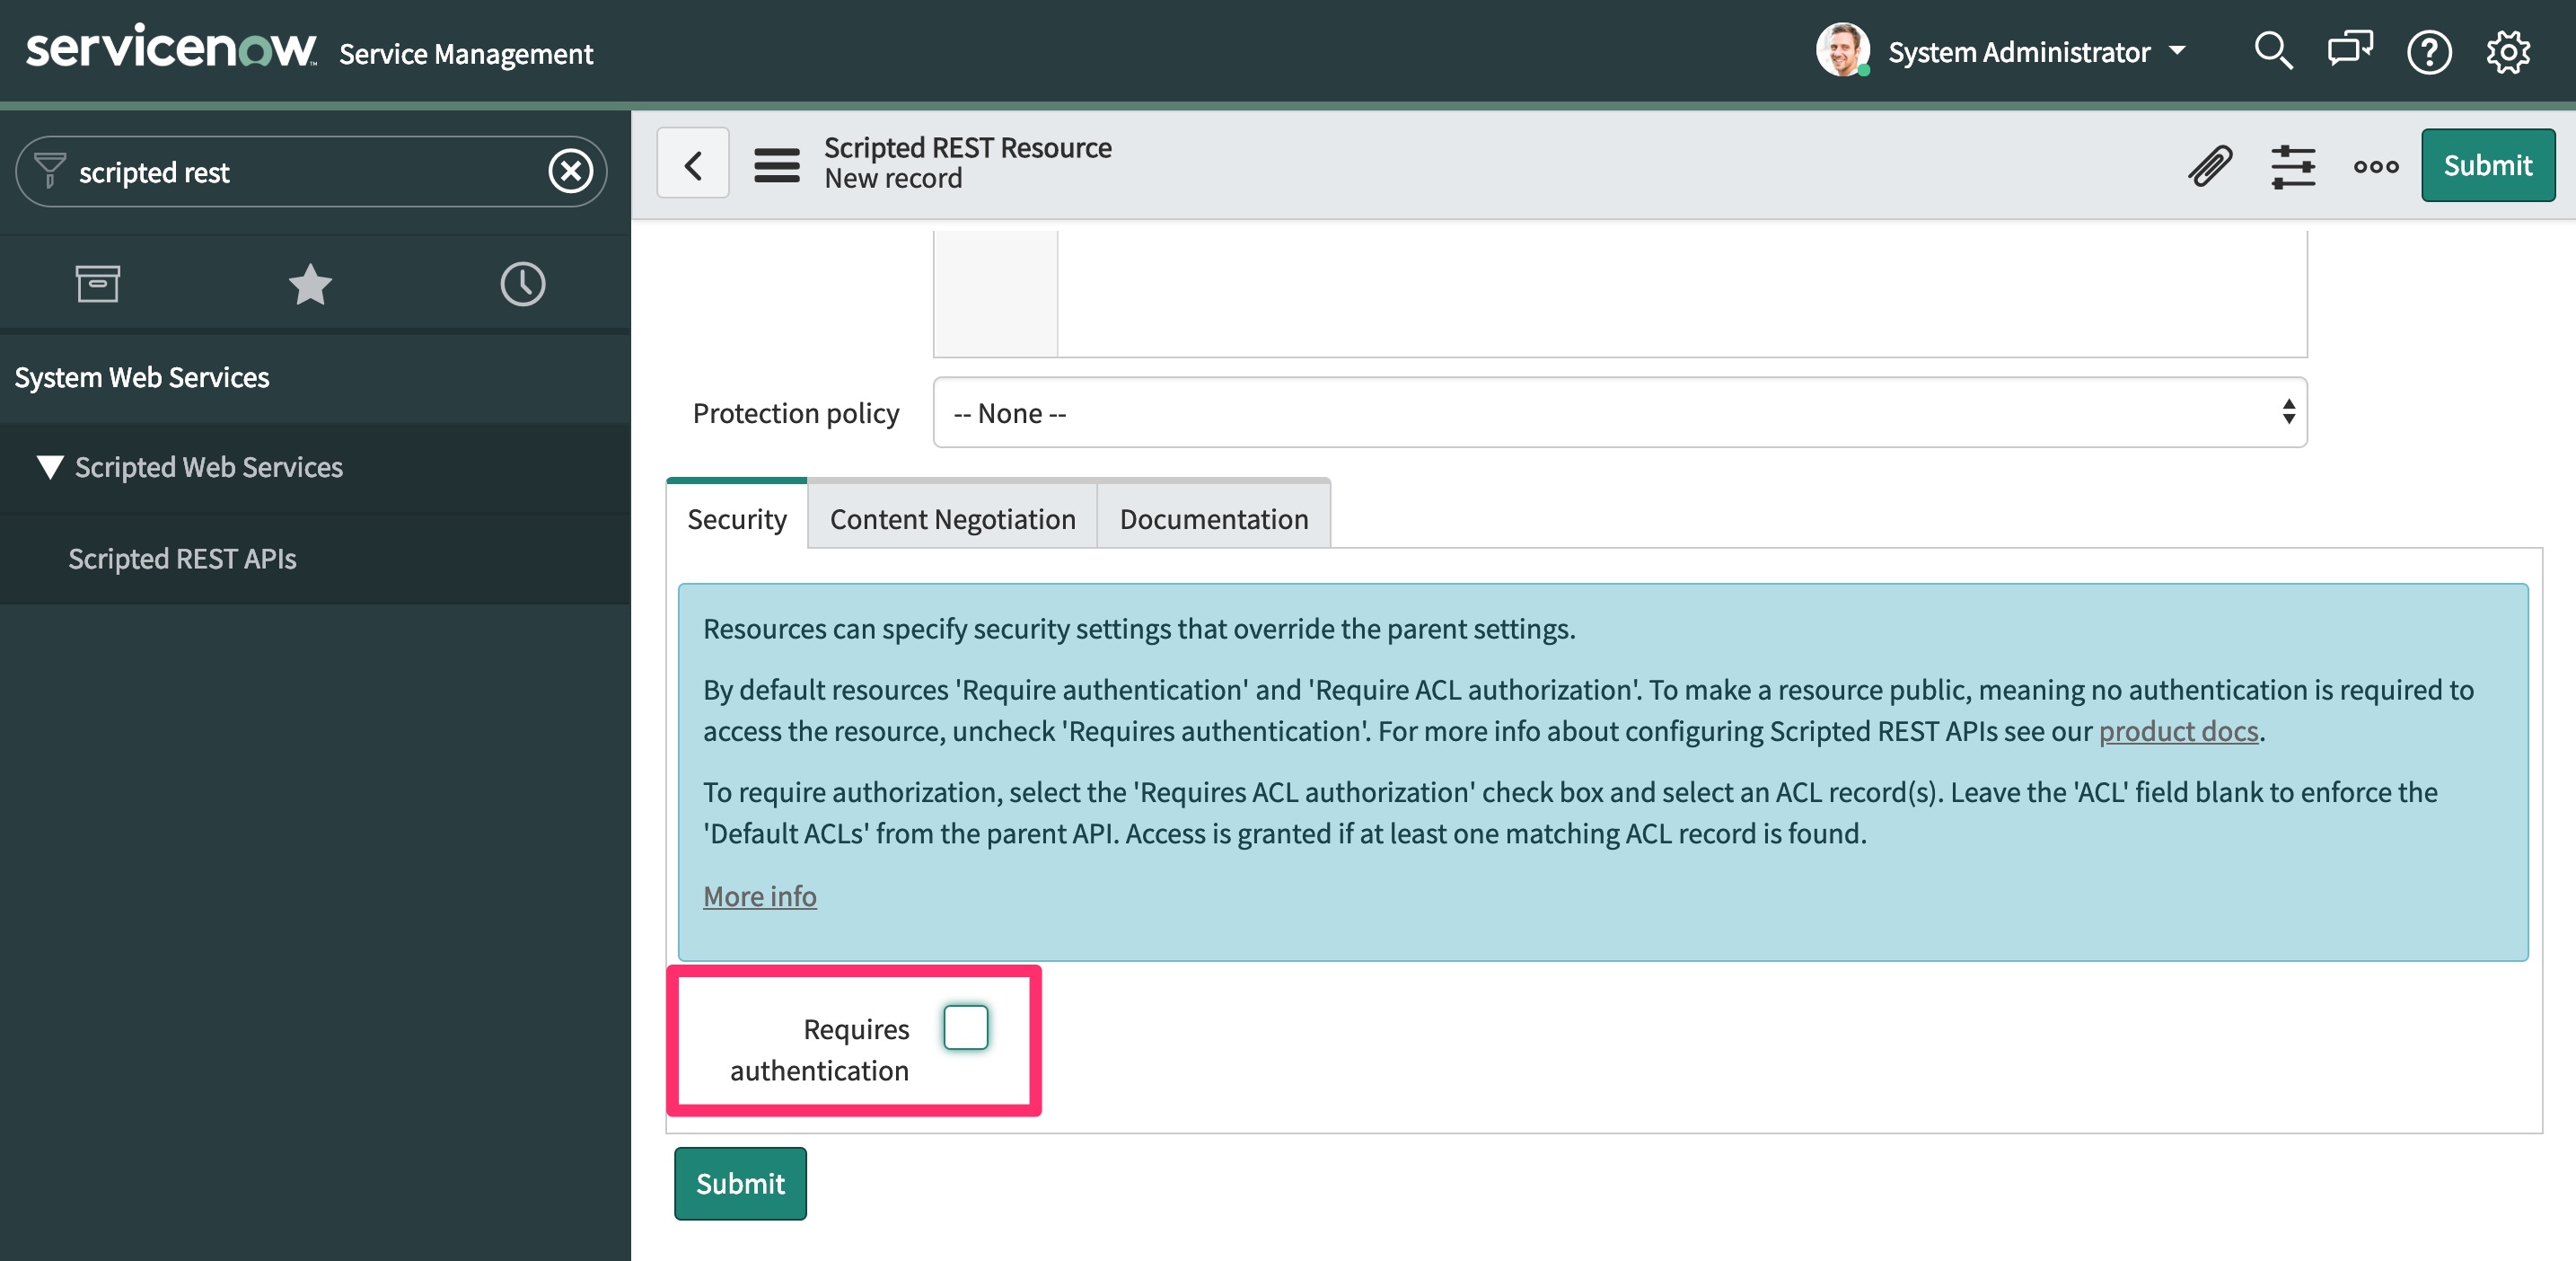
if you want to customize the code and add more information to the incident, go to BlazeMeter API Monitoring webhook payload to see what properties are available. - In the Security tab, uncheck the Requires authentication checkbox (we use the secret GUID variable to protect access to the API).
- Click Submit.
- Back on Scripted API page, look for the Base API Path field for our newly created API.

Our API endpoint will look similar to this:
https://<yourInstanceName>.service-now.com/<baseApiPath>?apiKey=<secret>Sending BlazeMeter API Monitoring notifications to ServiceNow via advanced webhooks
Follow these steps:
- Log in to your BlazeMeter API Monitoring account.
- Click your profile on the top-right and select Connected Services.
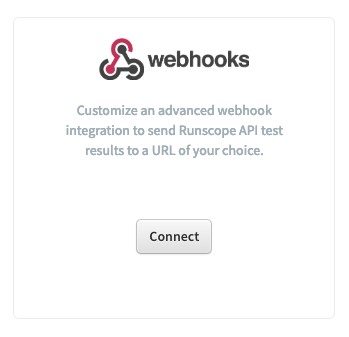
- Search for "Advanced Webhooks", and click Connect.
- Name your integration (we use ServiceNow Integration), and select a Threshold. We recommend leaving Notify when a test run is completed as the threshold for now for testing purposes.

- In the URL field, paste your API endpoint that you got from the previous section. It should look similar to this:
https://<yourInstanceName>.service-now.com/<baseApiPath>?apiKey=<secret> Make sure to replace <secret> at the end with the secret UID you used in the script.
 - Click Save Changes.
Testing our integration
To test the integration, you need to enable it in one of our tests so BlazeMeter can start sending webhooks to ServiceNow.
Follow these steps:
- Go to one of your buckets dashboard and create a new test.
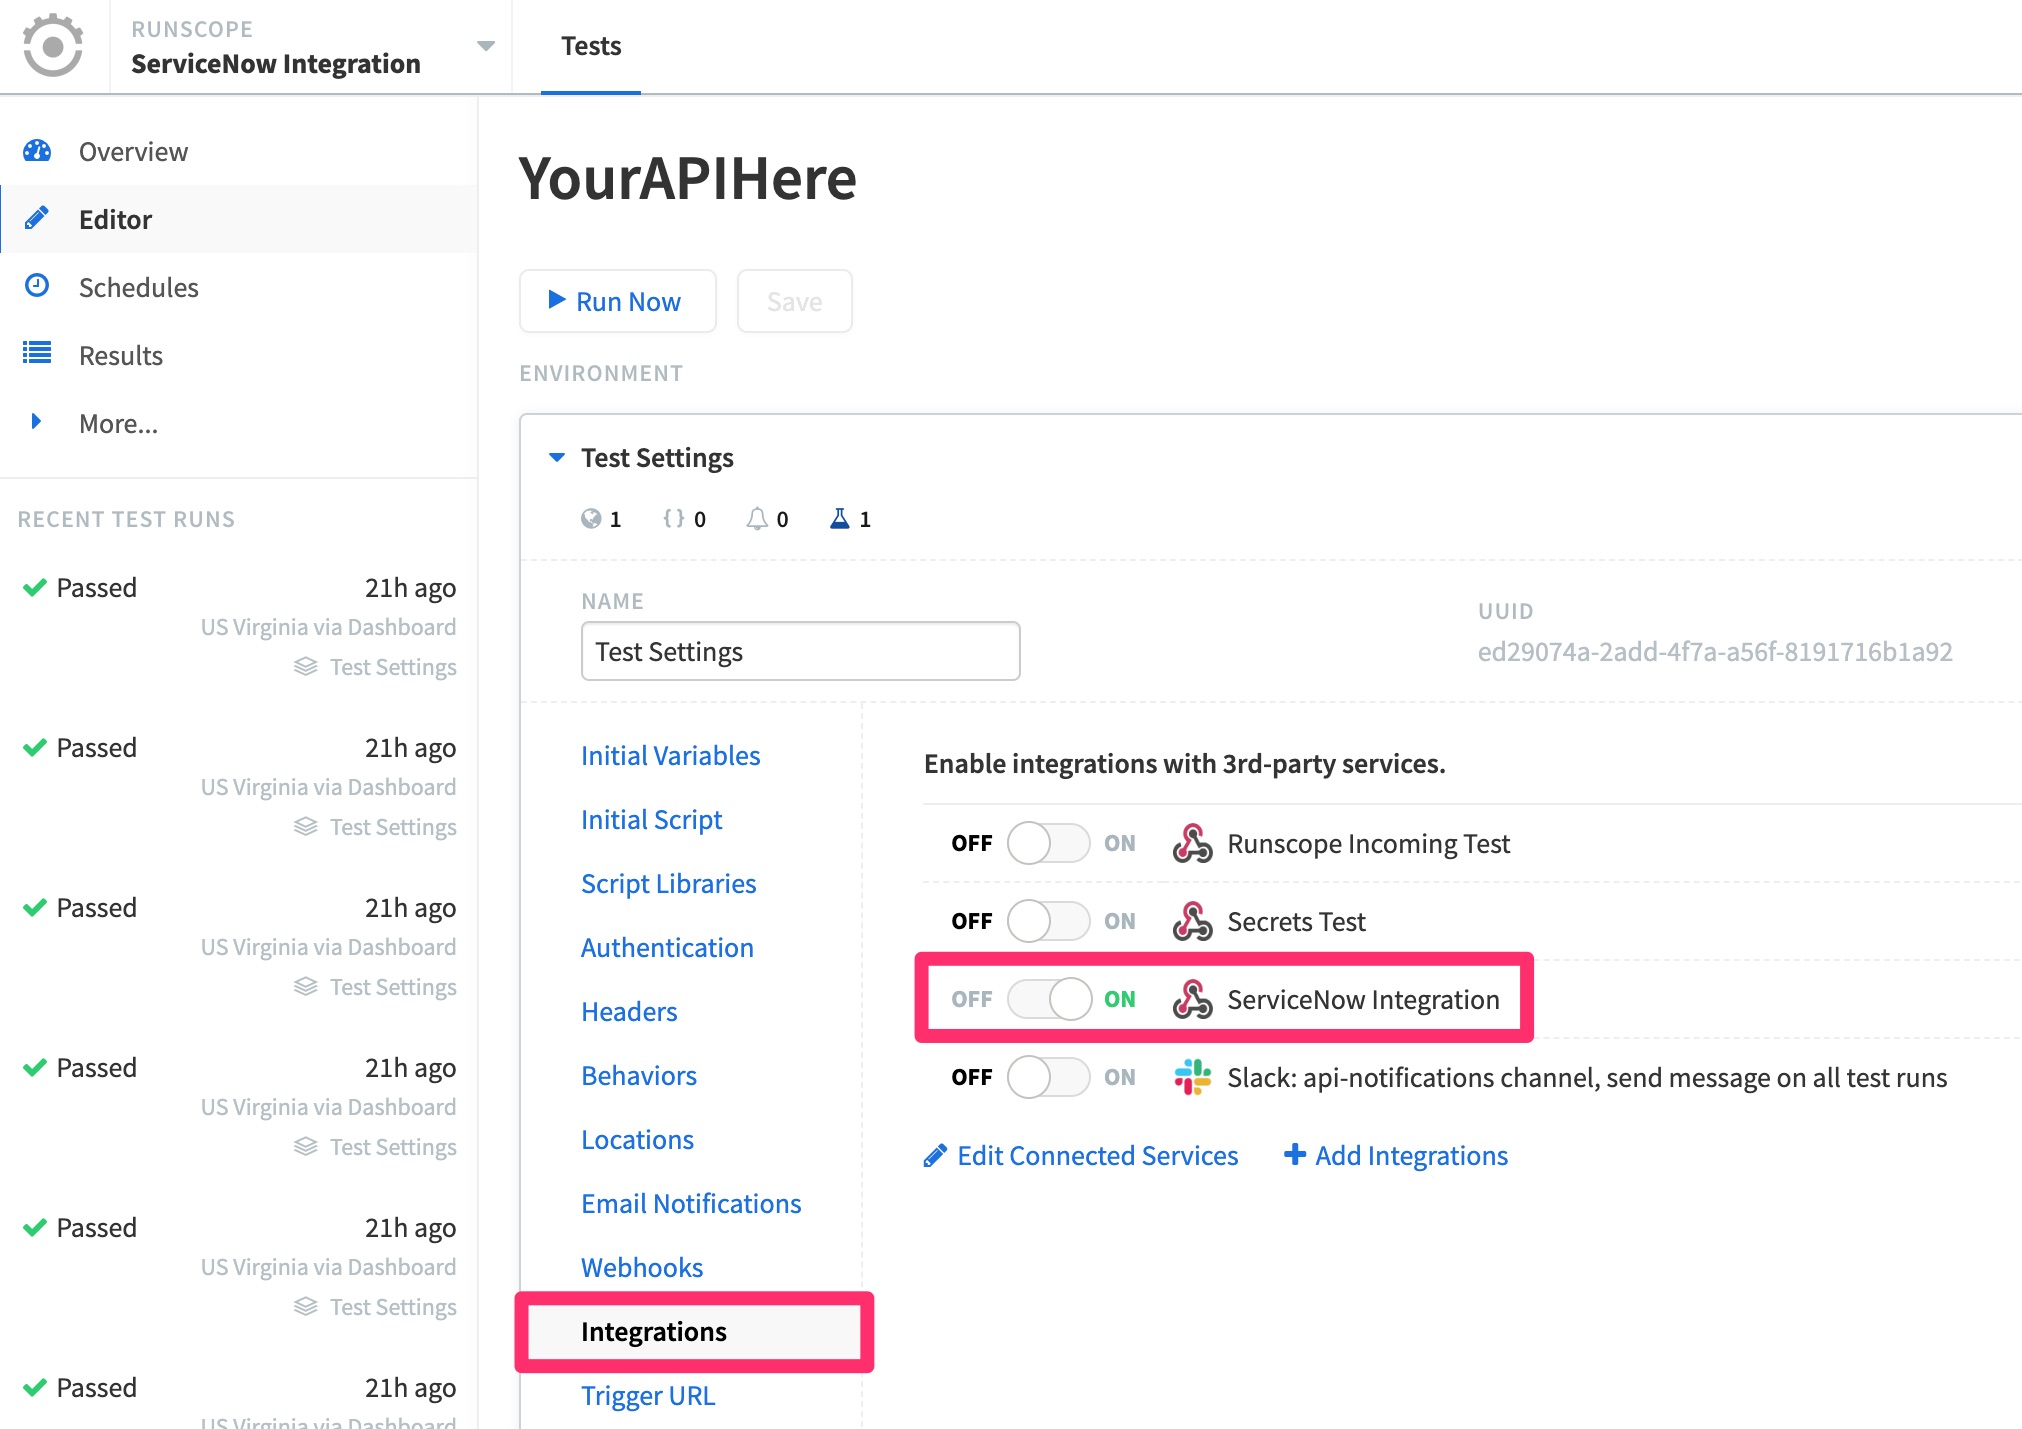
- In the test editor, open the environment settings, click the Integrations tab and toggle the ServiceNow integration we just created to On.
- To run the test, click Save & Run .
- Back in ServiceNow, on the left-hand side search box, type "Incidents".
- Under the Service Desk section, click Incidents.
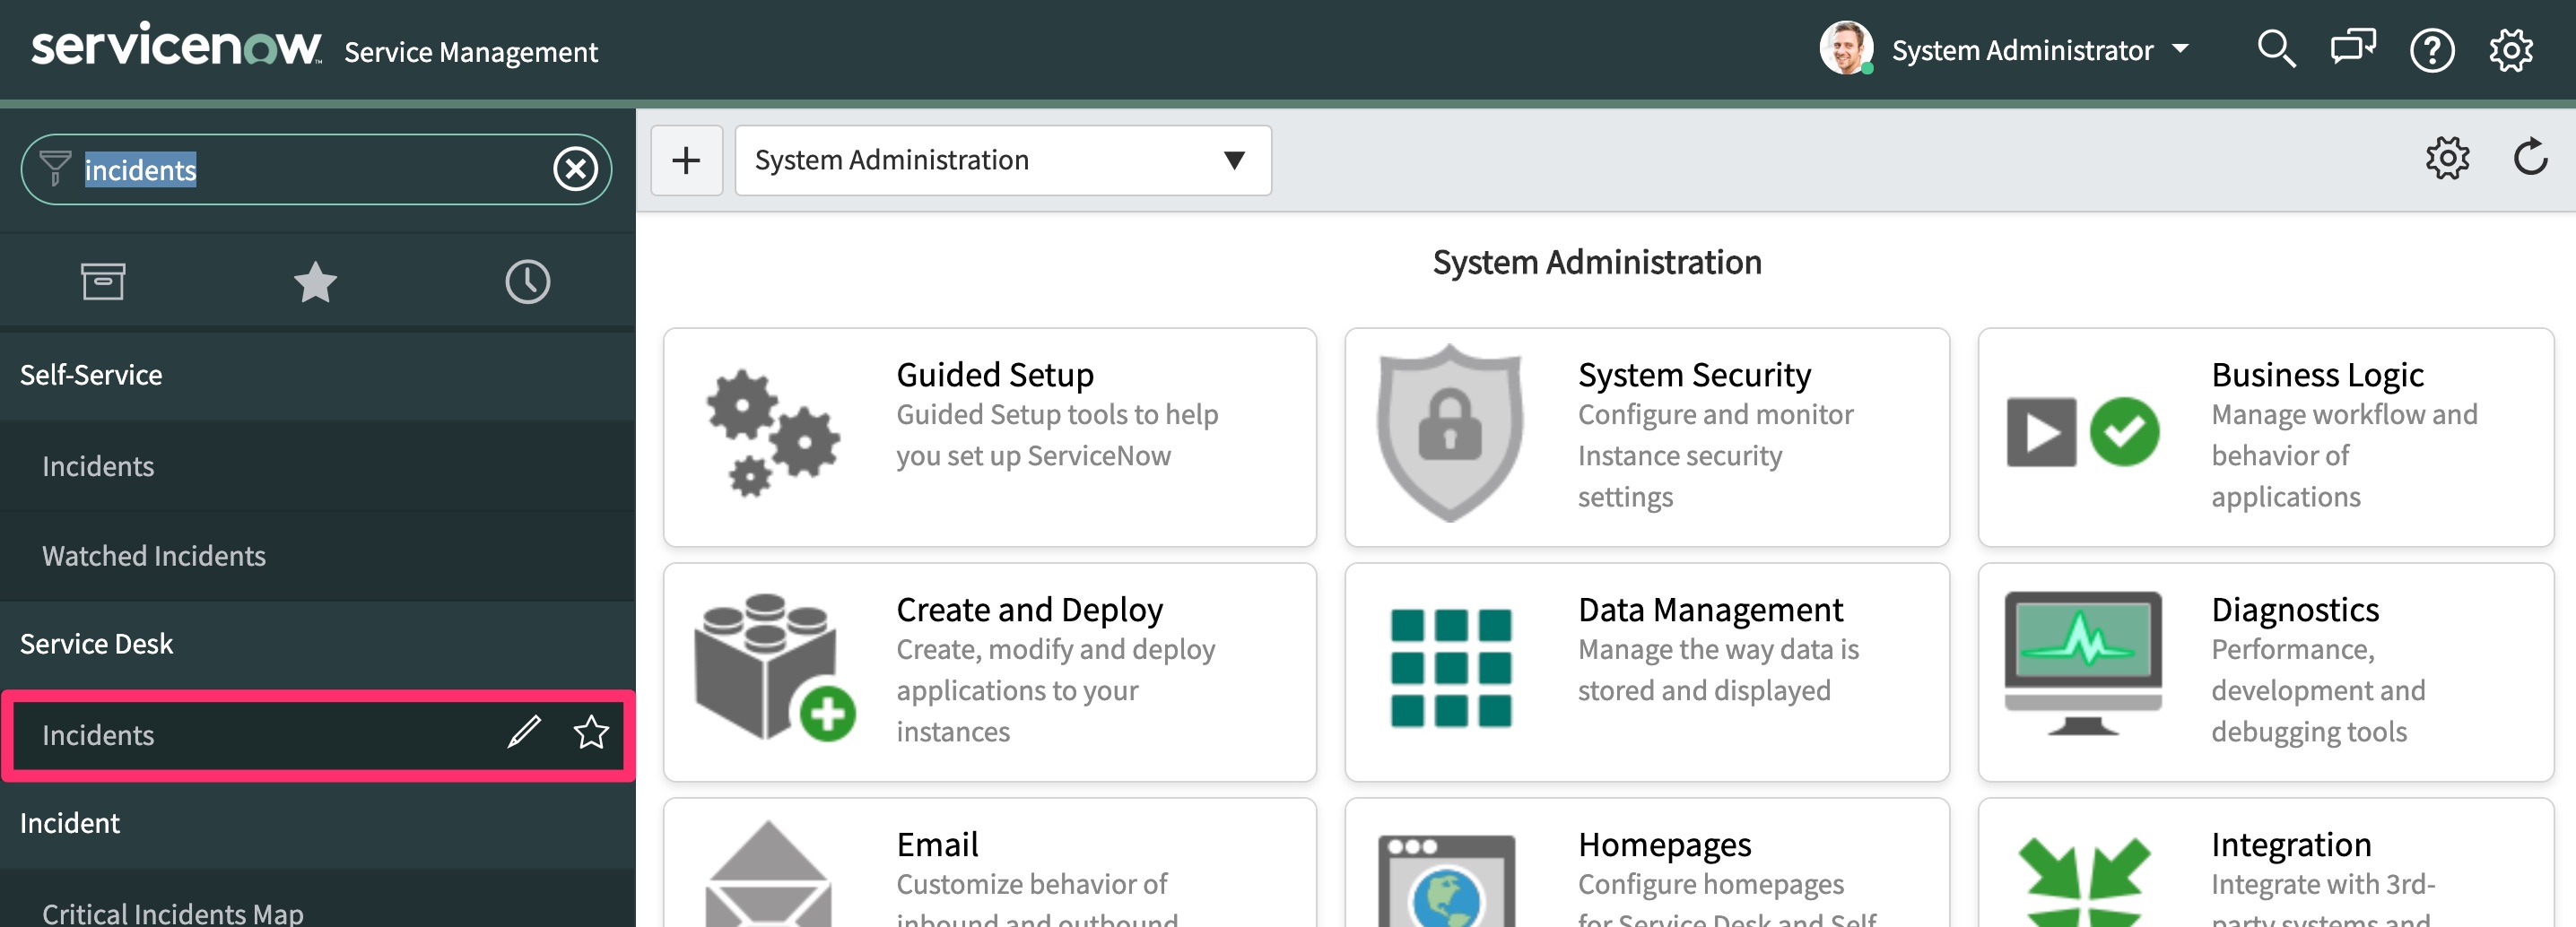
You should see a new incident created on the top of the list with information from your API Monitoring test run.
The integration is complete. No w that we know the ServiceNow API and the BlazeMeter API Monitoring integration are working, remember to adjust the Advanced Webhooks thresholds so alerts are only sent when you want them to. Go to the Connected Services page and click the edit icon next to your integration:
Changing the threshold options, so you can configure how often you want to create incidents for API failures:
Having trouble configuring ServiceNow? Contact our Support team.

