Create a virtual service template
Virtual service templates are common collections of transactions and parameter selections that you can reuse when you need to test against those transactions. For example, for a login service, you might create a template that includes a few transactions required for negative testing. Then, when you need to test those scenarios, you can quickly provision a virtual service based on that template to test with.
Templates override the transactions that are directly in a virtual service, and are meant to be a more persistent way to add commonly grouped transactions to a virtual service on the fly.
- Create a virtual service template
- Create a virtual service from a virtual service template
- Assign a template to a virtual service
- Create a virtual service template from a virtual service
Create a virtual service template
Follow these steps:
- Log in to your BlazeMeter account.
- On the Service virtualization tab, click Virtual services.
- Go to the virtual service templates tab and click the Add button.
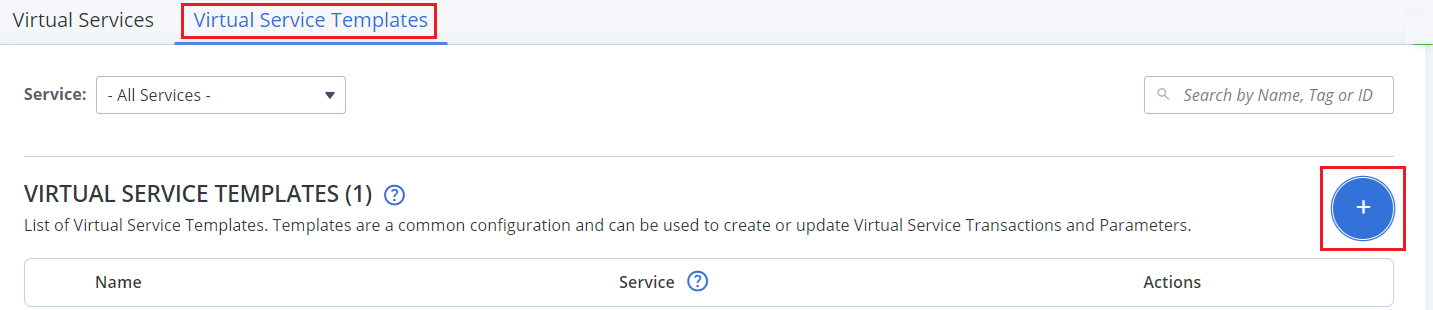
- Give the template a meaningful name.Provide meaningful names and descriptions because when testers are using the virtual services configuration to add virtual services to tests, they need to understand what might be relevant to their tests based on names only.
- Select or create the associated service. The service is a representation of the underlying live service, and it serves as a container for the transactions you will upload. If an existing service contains transactions that are needed for this virtual service, select the existing service.
To create a new service:- Click Select service.
- Enter the name for your new service and click Add service.
- Click the arrow to the left of the template name to edit template details.
- Enter a description for the template.
- (Optional) If the transactions needed for the template don't yet exist, drag a supported file type into the upload box. If the transactions already exist in the service you selected, skip to step 10.
To upload multiple Swagger files using a zip file, name the main file in the zip file index.json or index.yaml for the upload to work.
The Import transactions dialog opens.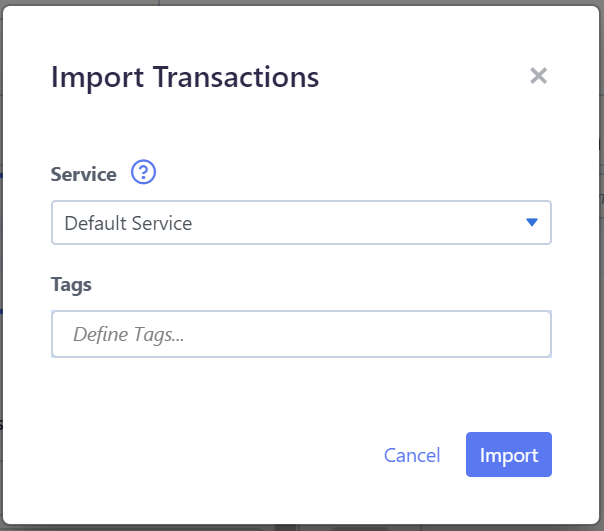
- Select the service that you specified in the service field next to the template name.
- If you want to assign one or more tags to these transactions, type the tag name(s) in the Tags field and press Enter.
- Tags make transactions easier to identify, especially within a large service. You can provide tag definitions here to apply the defined tags to all imported transactions. Or you can define tags at the transaction level after import.
- To enter multiple tags, press enter after each tag name.
- Click Import.
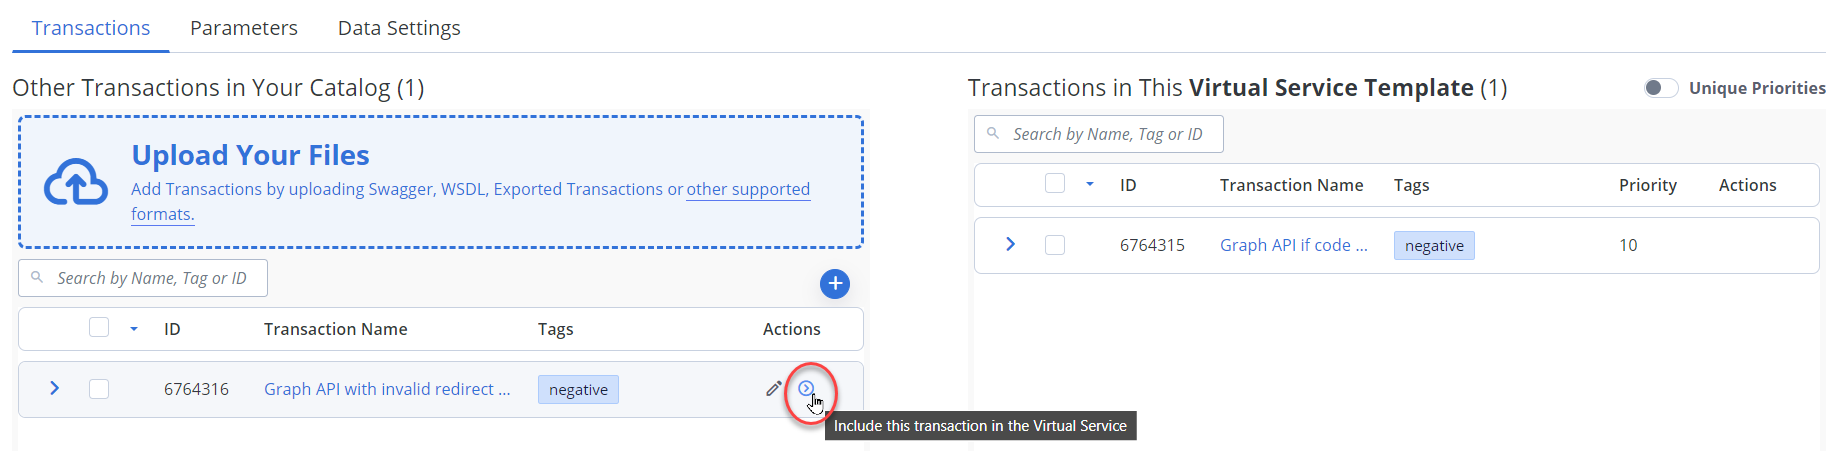
The imported transactions appear in the Other transactions in the Your catalog pane. - Select the transactions to include in the template, and click the right arrow icon to move them to the transactions in this virtual service template pane.
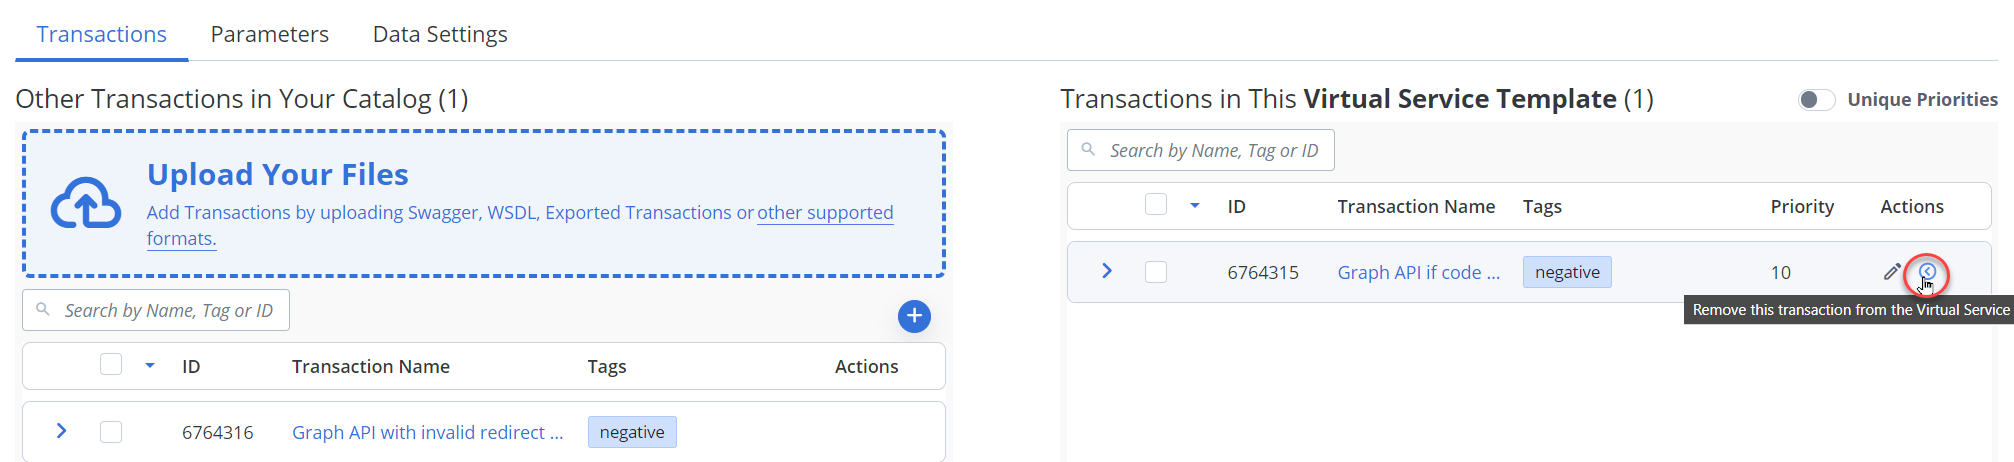
You can use a quick action to move transactions with a single click. Click the Include this transaction in the virtual service icon in the left column. To remove a transaction from the virtual service, you can click the Remove this transaction from the virtual service icon in the right column. Click to enlarge the screenshots.
- (Optional) Expand each transaction in the virtual service template and enter values in the Priority field to control the matching order to follow when a request matches multiple transactions.
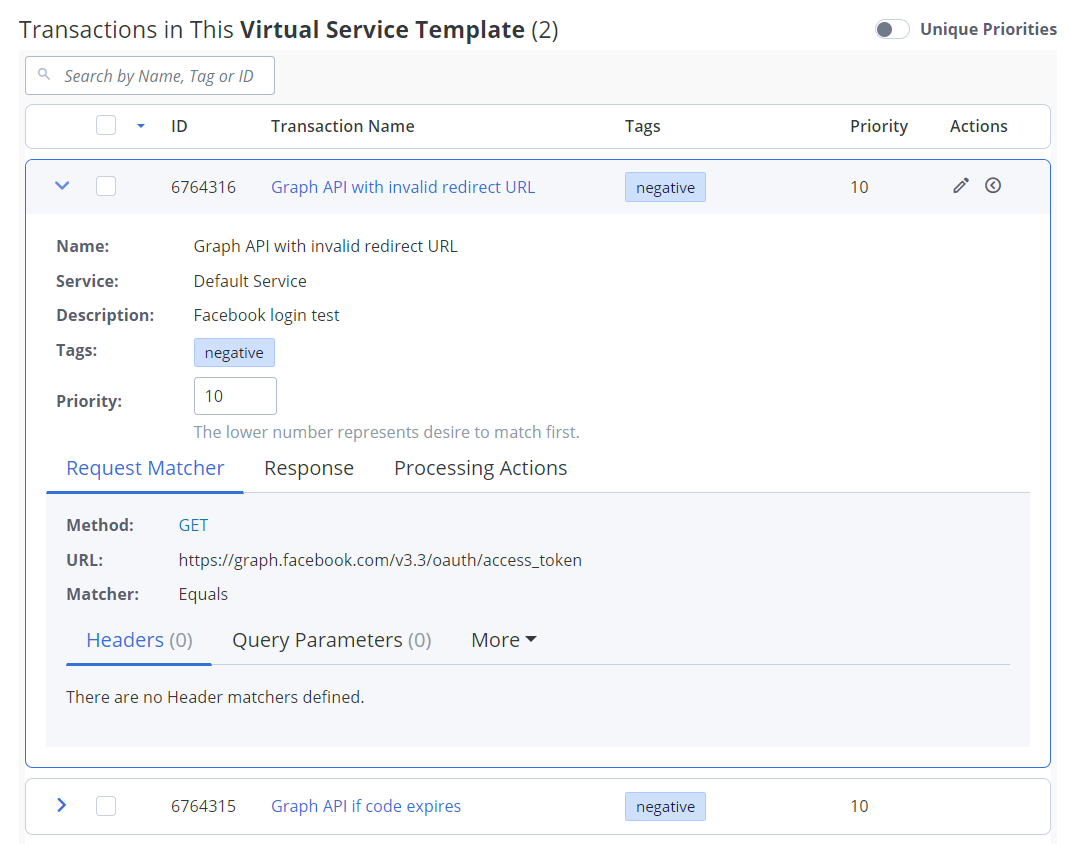
The transaction with the lowest number matches first. By default, all transactions have the same priority value, and a multiple matching scenario matches on the transaction with the highest ID number.
Setting a priority for a transaction only applies to that transaction within the specific template. In other virtual services or templates, the transaction can have a different priority value. - Click the Parameters tab.
- In the No matching requests field, choose the correct logic for when a request against the virtual service does not match any of the provided transactions. The request can either throw an error or be redirected to the live service.
- Set the Think time in milliseconds to control the amount of time spent between when the virtual service receives a request and returns a response. The default is 0, but you can update the field to simulate delayed responses of a fixed length in milliseconds, or define a randomized think time with lognormal or uniform distribution within bounds.
- Click Save.
Create a virtual service from a virtual service template
At any time after saving the template, click create virtual service to the right of the template name to dynamically provision a virtual service that includes the transactions in the template.
- Go to the Virtual service templates tab.
- In the Actions column, click the Create virtual service button.

Your virtual service is created and you can find it in the Virtual services tab.
Assign a template to a virtual service
You can assign a template to a new or existing virtual service at any time.

To assign a template to a virtual service:
- Navigate to a virtual service and in the Actions column, click the icon for Assign virtual service template from this virtual service:

- Select the template to assign and click Apply.
The template is assigned to the virtual service. If the virtual service already contained transactions, they are overwritten by the transactions in the template.
A template can be assigned to a virtual service if the service is stopped or running. In either case, the transactions in the virtual service will be overwritten with the transactions from the template assigned.
Create a virtual service template from a virtual service
After you create a virtual service with transactions, you may realize that you need to reuse that virtual service at a later date. Create a template from the virtual service to preserve its configuration for future use.

In the Actions column for the virtual service, click the icon for Create virtual service template from this virtual service to dynamically provision a virtual service that includes the transactions in the template:
![]()
A template is created with the same configuration as the virtual service and you can find it in the Virtual service templates tab.