Filtering report data
You can apply filters to report data to enhance the usability and effectiveness of performance testing data analysis. By narrowing down the scope of data presented in the reports, the filtering capabilities address various business needs and use cases.
The report header, visible from all BlazeMeter reports, contains the following filters:
-
DateTime
-
Scenarios
-
Locations

Filter by date and time
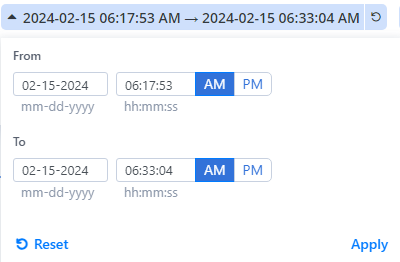
The DateTime filter lets you define a specific date and time range for your performance test reports. You can filter out data outside a specified time frame, providing a more focused view of the test results. You can also trim the ramp-up time at the beginning and end of a test. The timeline shows events that occurred during the test run, for example, the number of users was changed.
To define the date and time range, follow these steps:
-
In a report, click the timeline bar.
The DateTime picker displays.
-
Set the From and To dates and times
-
Click Apply.
To restore the original timeline of the test, click Reset.
Filter by location
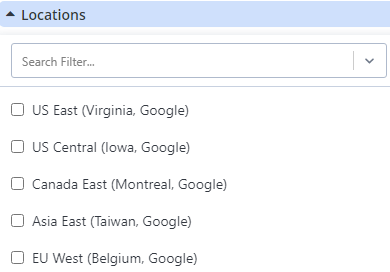
Locations lets you filter the information on the report, so only users and requests made from specific locations are listed. The Locations filter is disabled when there is only one location in the test run. The single location is selected and displayed by default.
To set locations, follow these steps:
-
In a report, click the Locations field.
-
Select one or more locations.
Filter by scenario
Scenarios lets you filter the information on the report, so that only users and requests generated by the requested scenario are listed. The Scenarios filter is disabled when there is only one scenario in the test run. The single scenario is selected and displayed by default.
To set locations, follow these steps:
-
In a report, click the Locations field.
-
Select one or more locations.
Filter by transactions
Exclude failed transactions
Failed transactions can increase the response time in case of session timeout error, or decrease the response time in case of an error returned immediately. For more accurate response time information, you can filter out failed transactions in the report to see results only for the transactions that passed.
BlazeMeter allows you to filter out transactions with HTTP error code and transactions with JMeter Assertion errors.
If you have failure criteria defined, you can see what is the status of each failure criteria, without the effect of the errors (however, overall Test status will not change). The filter can be applied also in the Compare Report screen and Trend Charts screen.
When selection is not possible, such as for the test results email, the default (failed and passed transactions) is shown.
The filter can apply only on test runs executed after the feature was released and the Exclude Failed Transaction flag was opened for the account.
Exclude failed transactions from a test report
In the report, select whether you want the test report data to include the failed transactions or not. By default, results of all transactions (failed and passed) are shown. You are filtering on the report level so the filter affects all relevant report data and tabs (Summary, Timeline Report, Request Stats and Failure Criteria).
Follow these steps:
- In the Performance tab, select Reports. The most recent reports are shown on top.You can also enter a report name in the search field to view top 5 recently executed reports.
- Click Show all reports and select a report to view its details.
A test report overview opens.
At the top of the page, you can filter by Scenario, Location and Transactions. For more information about Location and Scenario, see Filtering by Location and Scenario. - Expand the Transactions drop-down field.
You can choose any combination of the following transactions:- Passed
- Failed based on error code
- Failed based on assertionsBy default, report data for all transactions is displayed (data selected in the filter).
- Select Passed transactions.
Exclude failed transactions from the Executive Summary
Follow these steps:
- In the Performance tab, select Reports. The most recent reports are shown on top.
You can also enter a report name in the search field to view top 5 recently executed reports.
- Click Show all reports and select a report to view its details.
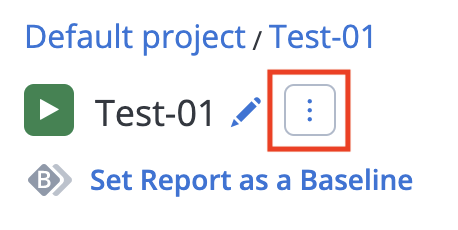
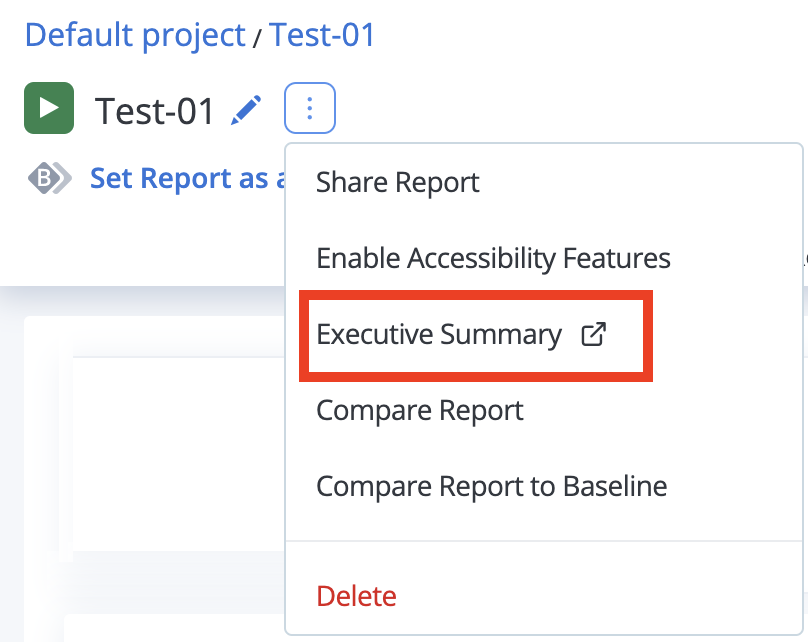
A test report overview opens. - Click the menu next to the test name.
- From the drop-down list, select Executive Summary.
Exclude failed transactions in Compare Report
Follow these steps:
- In the Performance tab, select Reports. The most recent reports are shown on top.You can also enter a report name in the search field to view top 5 recently executed reports.
- Click Show all reports and select a report to view its details.
A test report overview opens. - Click the menu next to the test name.
- From the drop-down list, select Compare Report.

- At the top of the page, you can filter by Scenario, Location and Transactions.
- Expand the Transactions drop-down field.
You can choose any combination of the following transactions:- Passed
- Failed based on error code
- Failed based on assertionsBy default, report data for all transactions is displayed (data selected in the filter).
- Select Passed transactions.
Failed transactions will not be included in your report.
Exclude failed transactions in trend charts
Follow these steps:
- In the Performance tab, select Tests. The most recent reports are shown on top.You can also enter a test name in the search field to view top 5 recently updated tests.
- Click Show all tests and select a test to view its details.
A test overview opens. - Click the Trend Charts tab.
