CircleCI integration
Integrating BlazeMeter API Monitoring with CircleCI
In this tutorial, we are going to show you how to include BlazeMeter API Monitoring tests in your CircleCI builds. We will use a small Python script and Trigger URLs, and we will change the build status based on the results of your test runs.
- Get your API Monitoring variables
- Set up the BlazeMeter API Monitoring Python script
- Integrate the script with CircleCI
Get your API Monitoring variables
Trigger URL
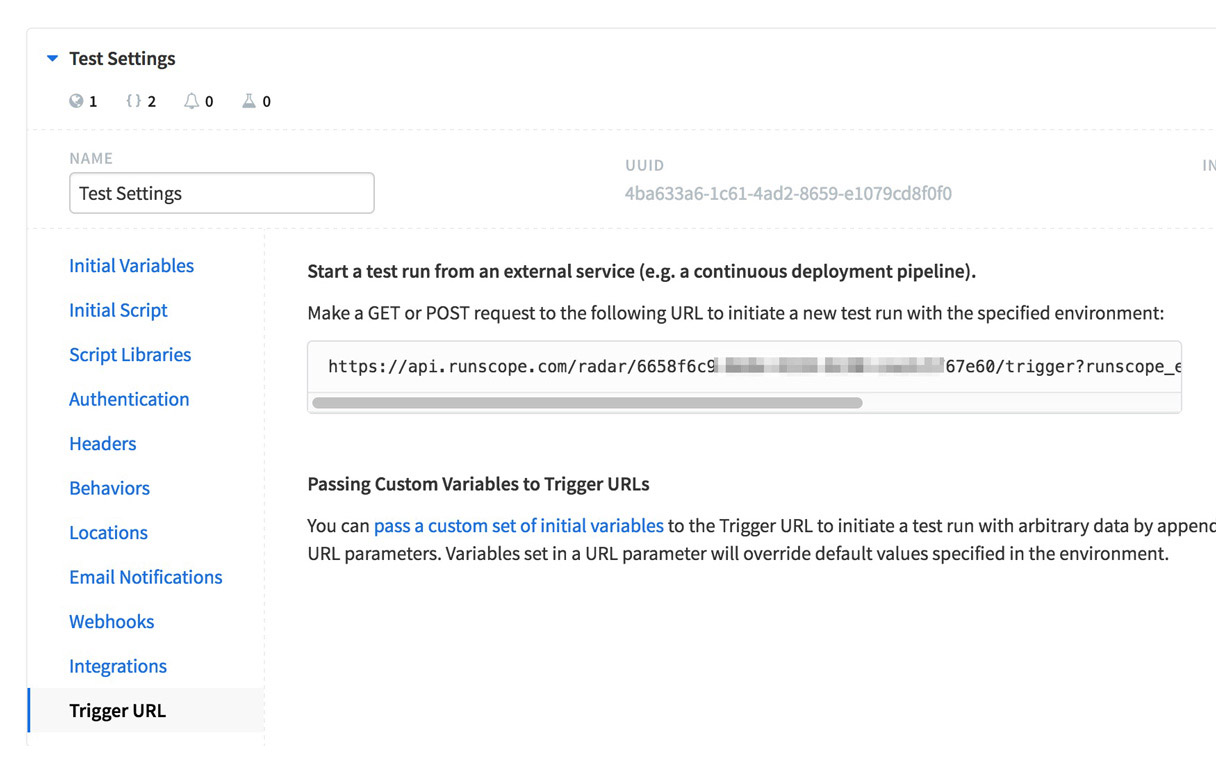
When running this script from the command line you can pass one parameter to it, which is an API Monitoring Trigger URL. If you want to run a single test, you can find its trigger URL under your environment settings:
If you want to run all the tests in a bucket, you can find a separate trigger URL in your bucket settings:

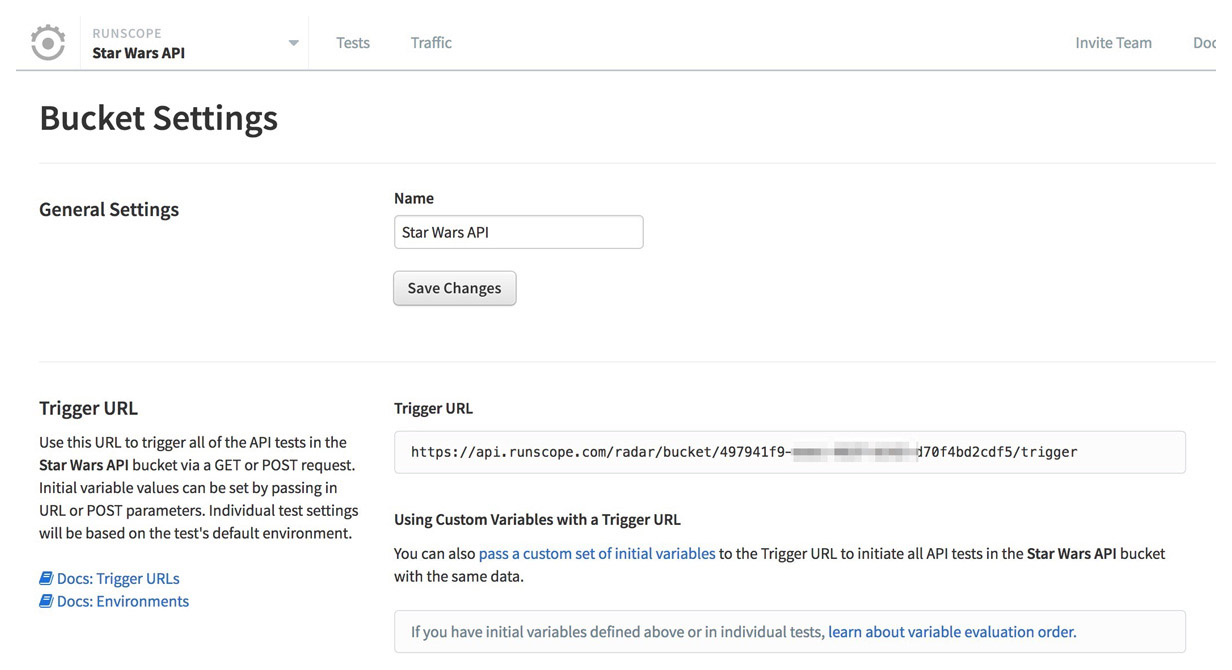
Make sure to copy the Trigger URL you wish to use, so we can use it with our script in the next steps.
Generating your API Key
We need a personal access token to interact with the API Monitoring API (Runscope API) and retrieve the results from our test run.
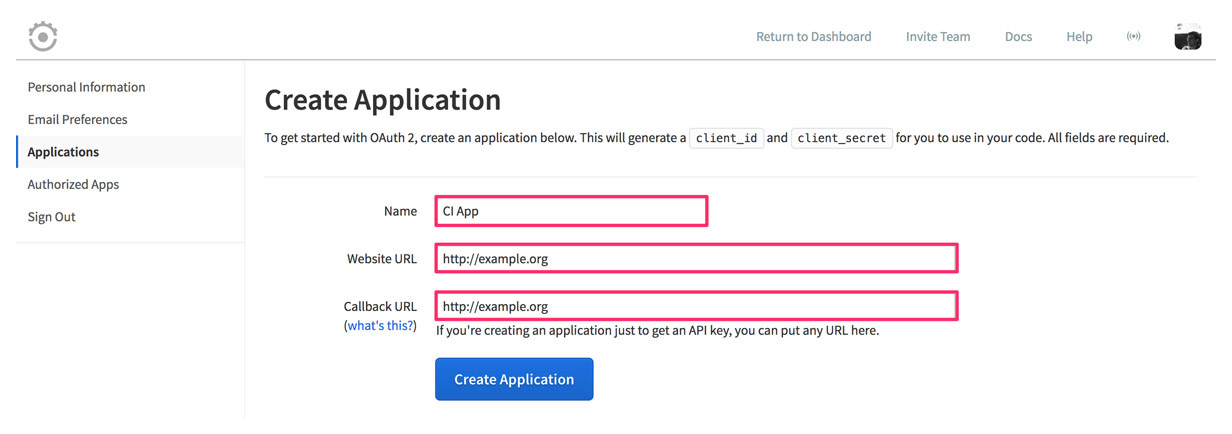
To get your access token, head over to your account's application tab, and click on Create Application. In the next screen, give your application a name, website URL, and callback URL. You can use dummy URLs if you're just using this app for your CI integration (e.g. http://example.org):
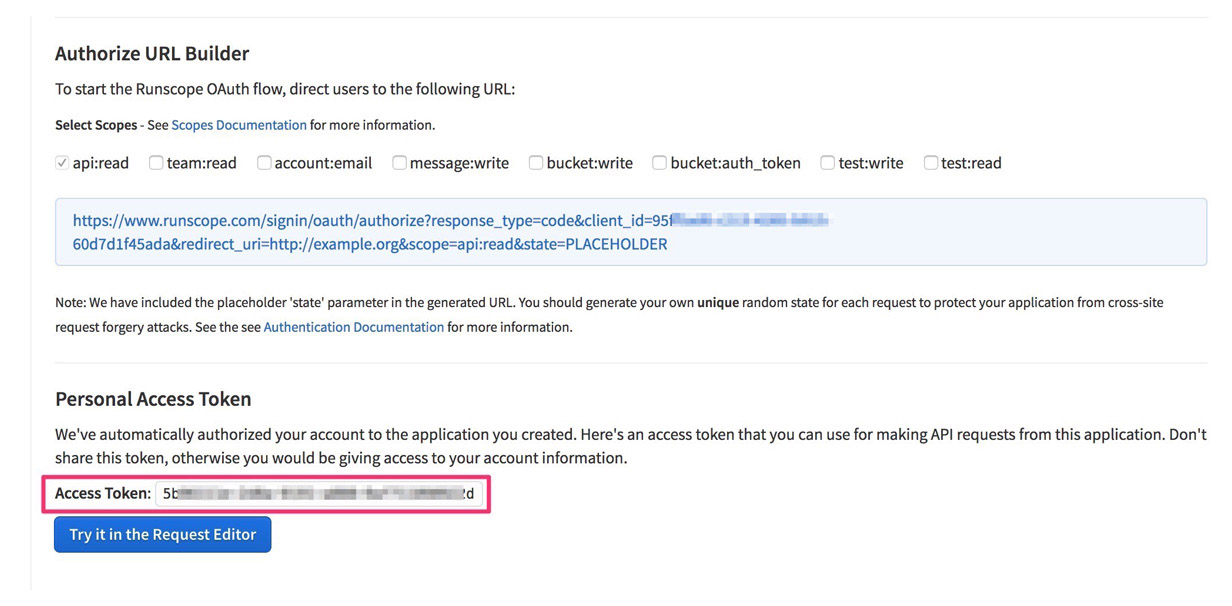
Click on Create Application to finish the process. Then, scroll down to the bottom of your new application page and copy the personal access token value. We're going to use that in our next step:
Set up the Python script
You can find the sample script in our GitHub:
The two files we're interested are requirements.txt and app.py. For this tutorial, we're just going to work with the raw links from our GitHub repository.
If you're integrating this into your project, we highly recommend either forking it to your own repository, or adding these files to a separate folder. That way, you can prevent your build from breaking in case there's an update to the repository.
Integrate the script with CircleCI
In your CircleCI account, select the Build tab on the left-hand side menu, and click on the gear icon next to the project you want to integrate with BlazeMeter API Monitoring to open its settings:
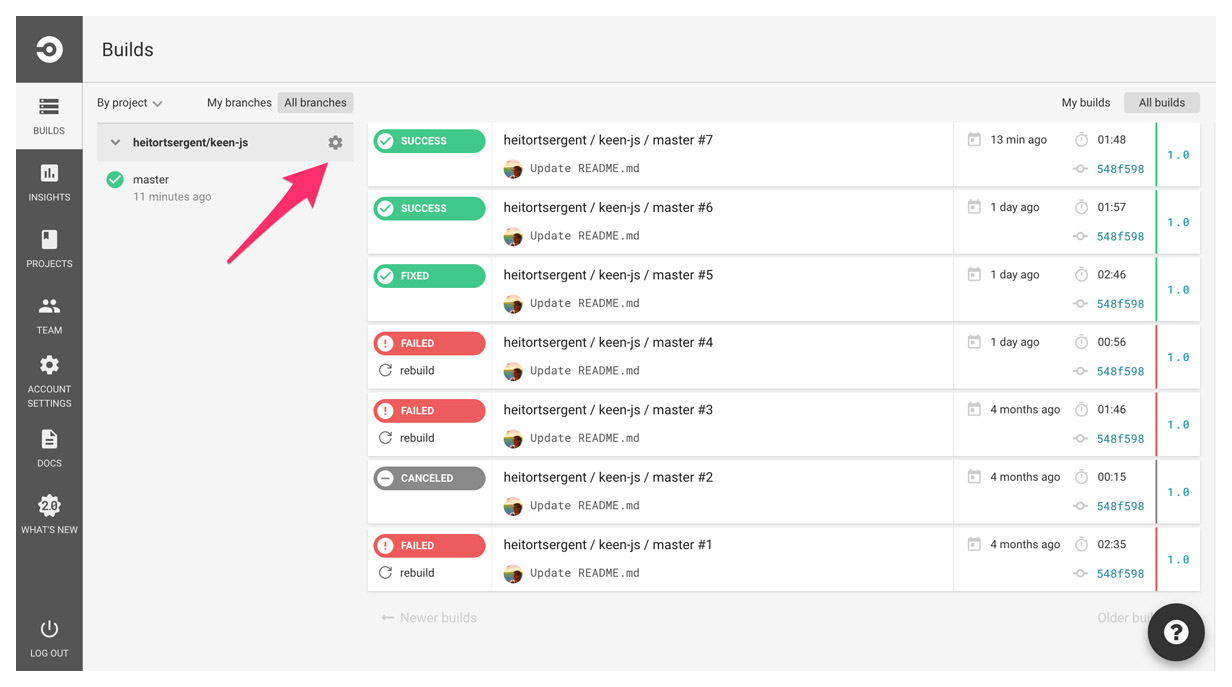
On the left-hand side Settings menu, click on Environment Variables under Build Settings, then click on Add Variable. We only need to add one environment variable here named RUNSCOPE_ACCESS_TOKEN. Paste the access token that you copied in our previous step under Value, and click on Add Variable:

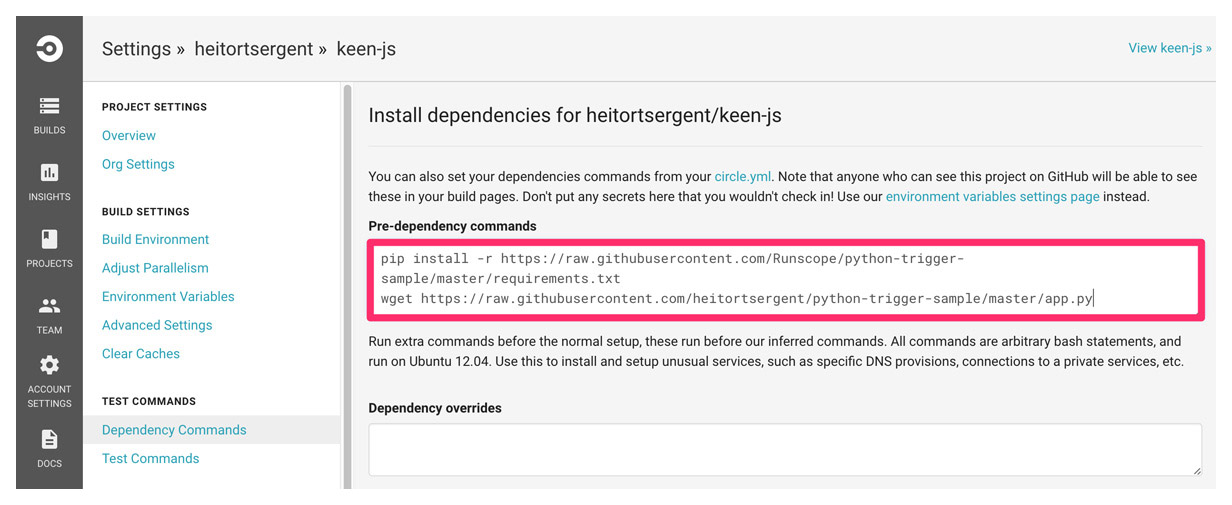
Now, let's go to Dependency Commands under the Test Commands menu.
The CircleCI environment already comes with python and pip pre-installed. The first thing we need to do is make sure the necessary packages for the script are installed. Add the following command to your Pre-dependency commands window:
pip install -r https://raw.githubusercontent.com/Runscope/python-trigger-sample/master/requirements.txt
Next, let's add another command just below it to download our app.py file (you can skip this step if you copied the file to your project):
wget https://raw.githubusercontent.com/Runscope/python-trigger-sample/master/app.py
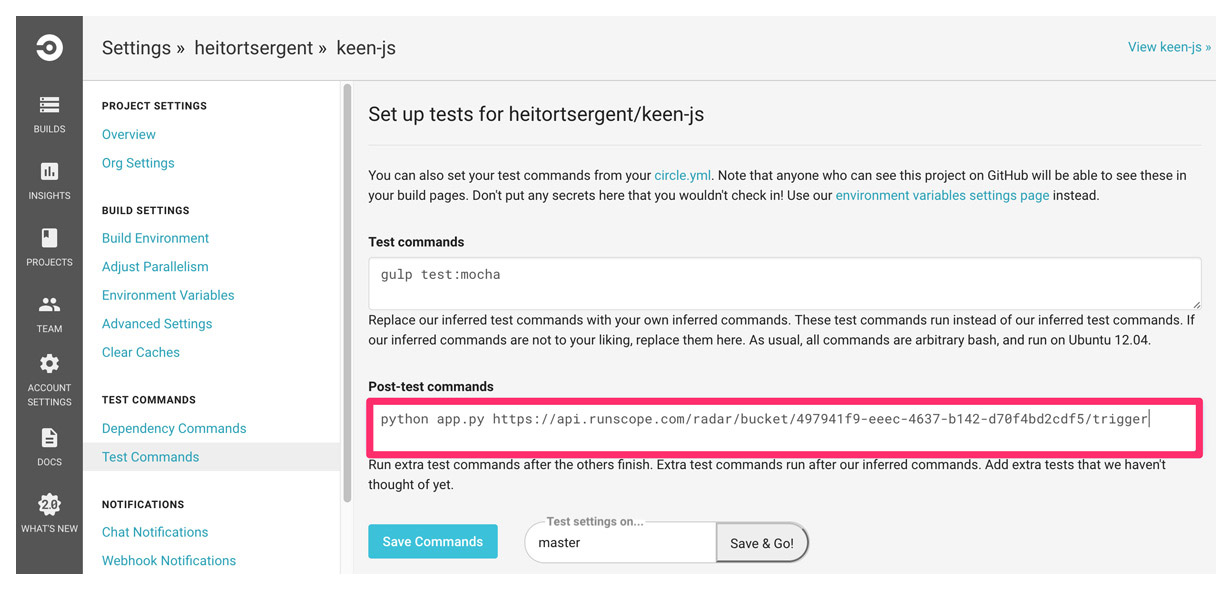
For the final step, let's head to Test Commands under the Test Commands menu. In the Post-test commands window, we can run our app.py script. It takes one parameter, which is the Trigger URL you copied at the beginning of this tutorial. So we can just run the command as:
python app.py https://api.runscope.com/radar/your_test_trigger_id/trigger?runscope_environment=your_runscope_environment_id
Continuous Integration complete
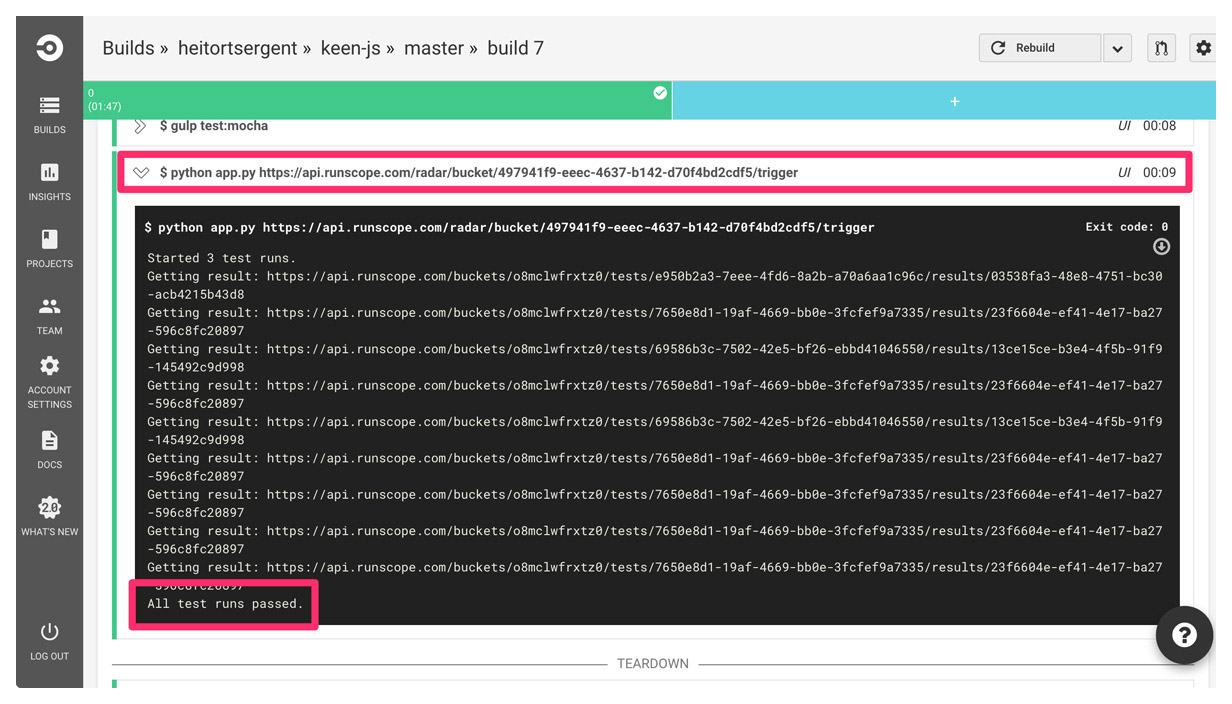
In your next build runs, you should be able to see an extra step running the Python script, and hopefully returning a green checkmark ✅:
Having trouble configuring CircleCI? Contact our Support team.