Load configuration
BlazeMeter is designed to speed the iterative process of testing. You can control frequently changed parameters from within the BlazeMeter UI or API by overriding existing values. In this way, you eliminate the need to edit hard-coded values in your scripts and re-upload them between tests.
- Override Settings
- Disable Overrides
- Select Total Users
- Configure Duration or Iterations
- Configure Ramp Up Time and Steps
- Limit Requests per Second (RPS)
- Change RPS Limits During Test
- Change the Number of Users During a Test
To learn how to update the load configuration, watch this video. Detailed steps follow.
Override settings
In the Load Configuration section, you can control the number of users, the test duration, and ramp-up options by overriding existing settings.
Follow these steps:
- On the Performance tab, open a test or create a test.
- On the Configuration tab, scroll down to the Load Configuration section.
- Specify appropriate values in the Total Users, Duration, and Ramp Up Time fields.
-
(Optional) Specify additional options:
- To limit the number of requests per second (RPS), click a preconfigured value in the Limit RPS list.
- To limit the number of ramp up steps, click a preconfigured value in the Ramp Up Steps list.
In a multi-test scenario, you can also set overrides for individual tests that run as part of the multi-test. However, if overrides are disabled in a multi-test, the values will be taken from the original script of each single test.
Disable overrides
If you do not want to use any overrides, instead relying on the configuration in your original script, you can disable any and all overrides.
Follow these steps:
- In the Performance tab, open a test or create a new test.
- In the Configuration tab, scroll down to the Load Configuration section.
-
Click the toggle icon for each override you want to disable. Toggled right (and blue) is enabled. Toggled left (and gray) is disabled.
When an override is disabled, the slider bar and number field is gray and will not be applied.
To disable all overrides, ensure all toggles are set to the left (gray).
Overrides can only be disabled under the following conditions:
- You have a paid BlazeMeter account.
- Your script is a JMeter script.
- If your script is not a JMeter script, overrides will be disabled only if you upload a Taurus YAML configuration file with your script and set the YAML file as the main test file, which will automatically disable UI overrides.
Select total users
Select the number of users you want deployed at the peak of your test. BlazeMeter will divide this user population across the number of test engines deployed.
If your script uses multiple thread groups, the following will apply:
- If each thread group in the script is configured for 1 user (the default setting) in the Number of Threads (users) field, BlazeMeter will divide the total number of users evenly across the thread groups, rounding up and down as needed.
Example:
If you specify 10 users for 2 thread groups, each thread group will run 5 users. If you specify 6 users for 3 thread groups, each will run 2. If you specify 11 users for 3 thread groups, BlazeMeter will round up (from 3.66) and each will run 4. If you specify 7 users for 3 thread groups, BlazeMeter will round down (from 2.33) and each will run 2. - If you specify different user numbers for each of your multiple thread groups, BlazeMeter will maintain the ratio of threads between the thread groups in the JMX script to achieve the total users you specify here.
Example:
If your JMX script has 3 thread groups and the Number of Threads (users) field in each of them is set to 5, 3, and 2 respectively, then a test with 1000 users specified in the Load Configuration section will run 500, 300, and 200 threads through those thread groups.
Configure duration or iterations
You can configure your test to run either for a specified duration or for a specified number of iterations.
Follow these steps:
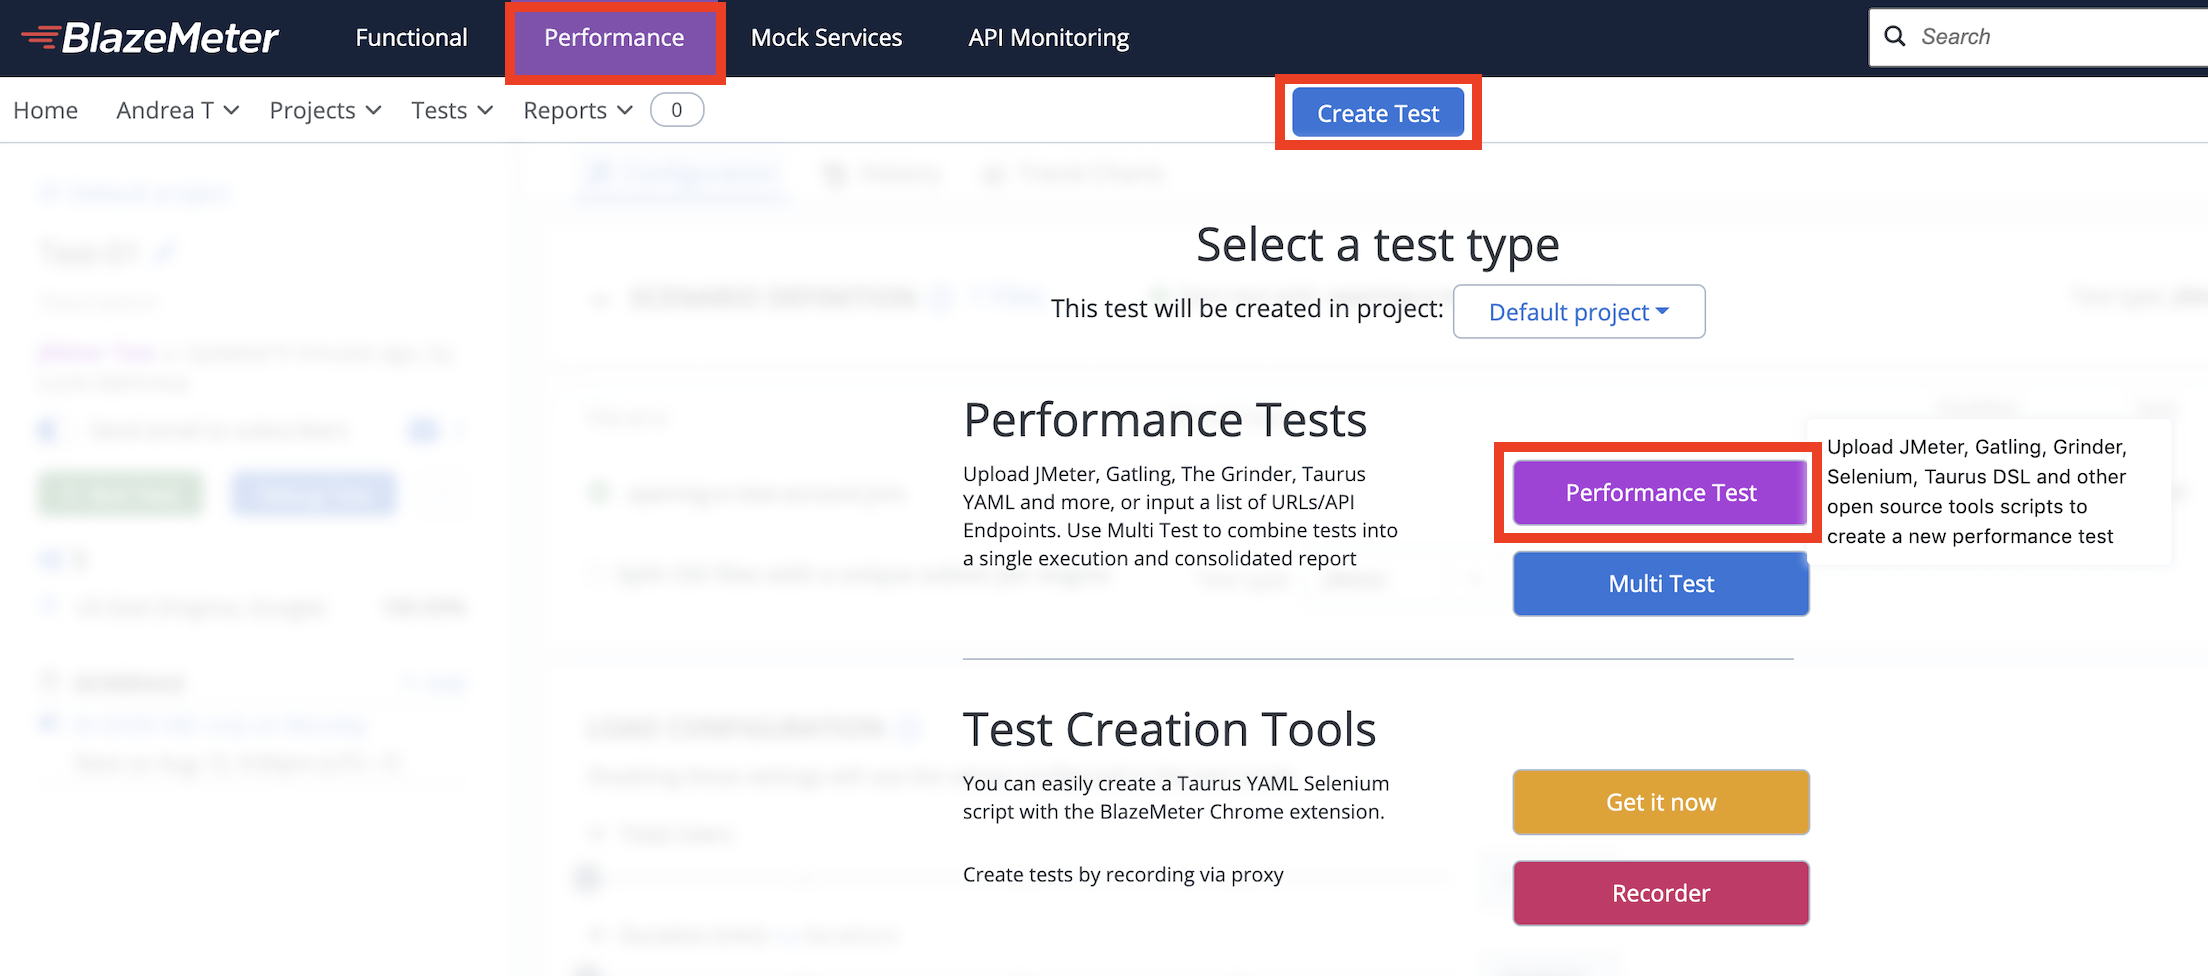
- On the Performance tab, click Create Test and Performance Test.
- Scroll down to the Load Configuration section.
- In the Duration / Iterations section, turn on one of the following options:
- Duration: Set the duration for the entire test, in minutes. The test will run infinite iterations until the duration is met.
- Iterations: Set the number of iterations instead. The test will run long enough to complete all iterations.
Limitations
When you specify iterations, be aware of the following limitations:
- You cannot run a test with a duration longer than your plan limit.
- If you configure a high-iteration test using the overrides, BlazeMeter will apply a default duration of approximately 1 hour and 10 minutes. This safeguard is to prevent infinite tests, which can place an undue burden on system resources. If you must run a high-iterations test that will exceed an hour in duration, you can disable overrides and set values directly in your script, in which case the test can run through all iterations to completion.
- If you disable overrides and have infinite iterations (loops) set in your script, specify a duration in your script.
Example:
If you configure a JMeter test to run infinite loops with no duration, BlazeMeter will apply a 10-second duration. This safeguard helps to prevent an undue burden on the system caused by infinite tests. - You cannot configure duration and iterations at the same time when you specify overrides, but if you disable all overrides, you can configure duration and iterations in the script (for example, in a JMeter script). If you configure both, the test will run until whichever limit (iterations or duration) is met first.
If you find that your test ended before running its full duration, review the preceding list of limitations for the possible cause.
If executing a JMeter test, you can download the artifacts.zip file from the Logs Report. Inside is a modified_{your_script_name).jmx file. If you open that modified JMX file in your local JMeter, you can see any thread group overrides that BlazeMeter might have applied to your script.
Configure ramp up time and steps
You can select how fast you want the test to ramp up. This is the elapsed time in minutes from the test start until all users are running. You can also select the number of steps for the ramp-up of your test.
To configure ramp-up time, follow these steps:
- On the Performance tab, click Create Test and Performance Test.
- Scroll down to the Load Configuration section.
- Move the Ramp Up Time slider or enter the number of minutes in the box.
To configure ramp-up steps, follow these steps:
- Go to the Load Configuration section.
- In the Ramp Up Steps box, enter the value or expand the drop-down menu to select a value.
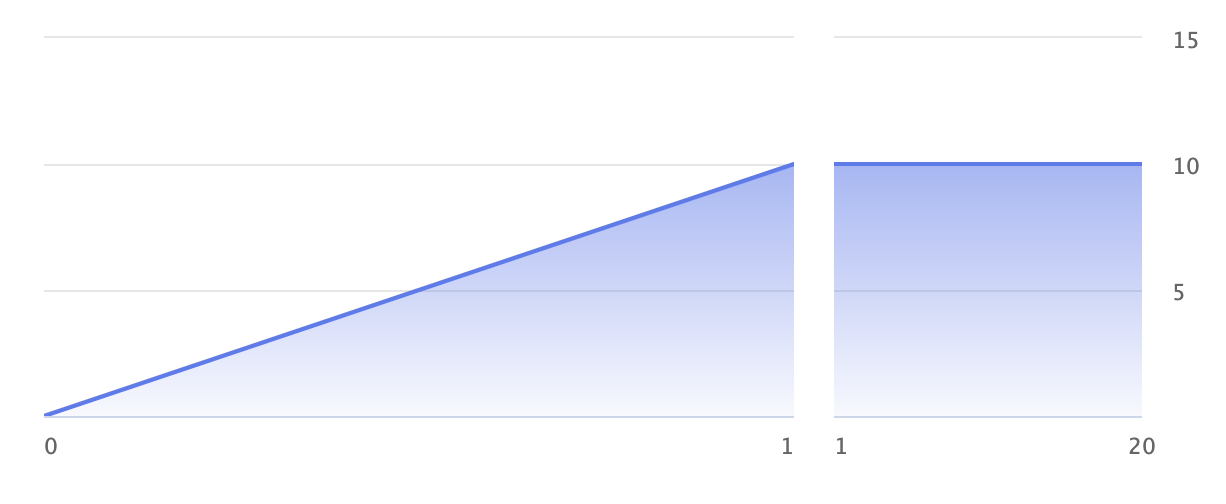
- The default value is 0, which delivers a linear ramp-up from test start until the end of ramp up time:
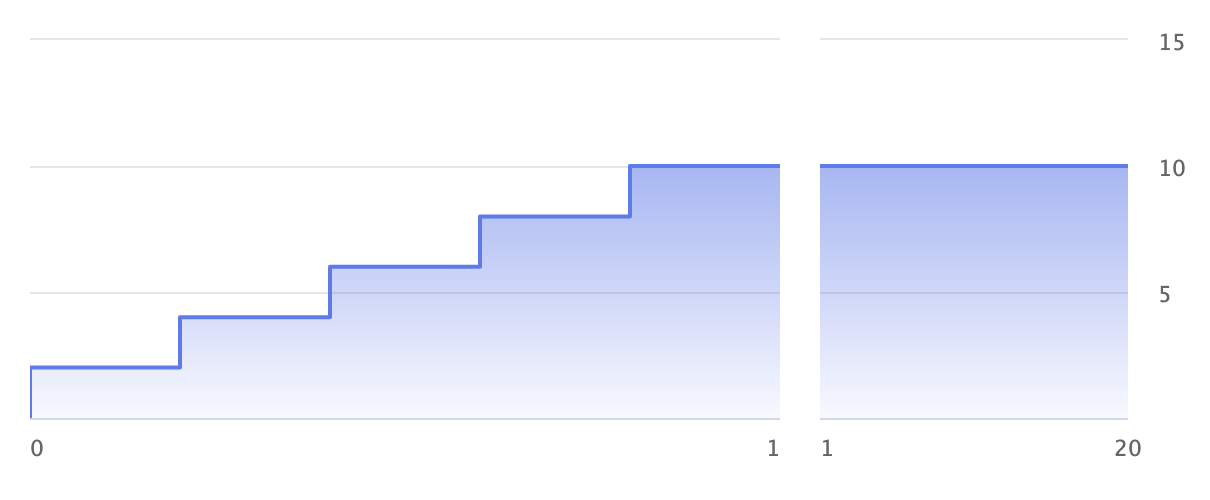
- A value of 5 delivers 20% of the peak users at the start and reaches 100% at the start of the 5th step:
Limit Requests per Second (RPS)
With the RPS setting, you can specify the maximum number of requests per second (RPS).
To configure the RPS setting,, follow these steps:
- Go to the Load Configuration section.
- In the Limit RPS box, type or select a value.
When you use this setting, you will see a Change RPS button on your live test reports and can make changes during the test.
Change RPS limits during a test
To see how the number of requests per second affects system performance, you can change RPS limits during a test.
- Start a test.
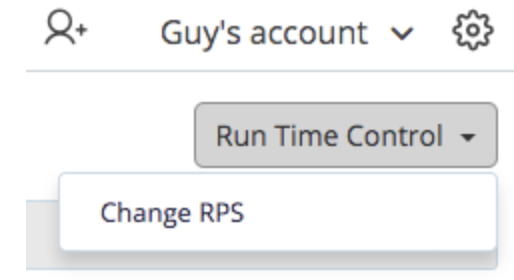
- At the top right corner of the reports section, click Run Time Control.
- Click Change RPS.
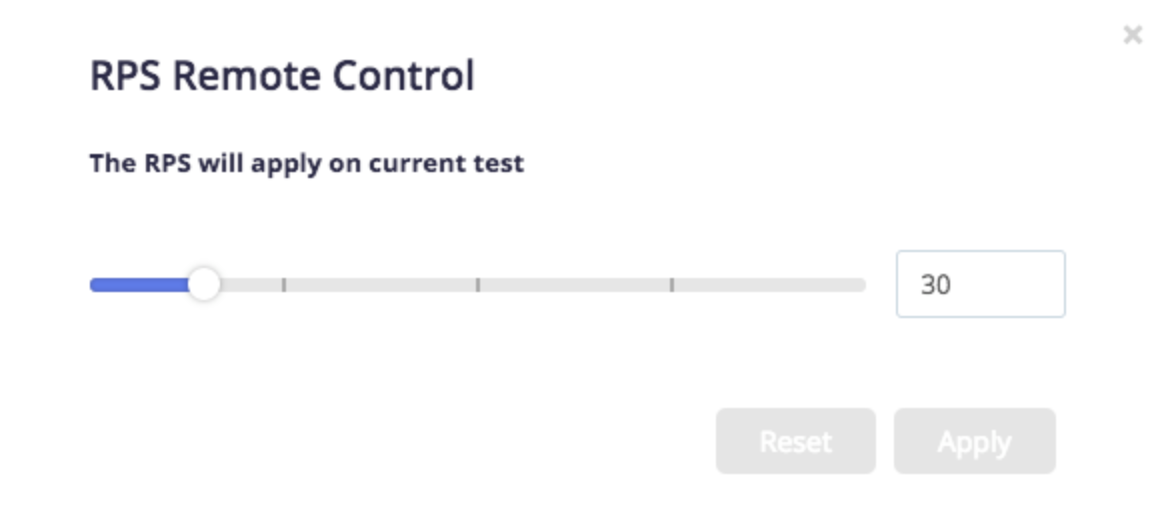
-
To submit the new value to the test engines, in the box, set the RPS value and click Apply.
Change the number of users during a test
You can change the number of concurrent virtual users during load testing to enhance the quality of performance insights.
Video demo
The following video quickly summarizes how to dynamically adjust the number of virtual users when executing a performance load test.
This feature provides an enhanced view of an application's behavior under various conditions, aids in uncovering latent issues, and can contribute to robust application performance optimization. Testers and developers alike can use this technique to fine-tune their applications with the goal of efficient operations even during periods of high user demand. The feature is designed to provide the following benefits:
-
During normal operations, the number of users engaging with an application varies. By altering the number of concurrent virtual users in real time, you can replicate the dynamic user patterns observed in real-world scenarios, providing a more accurate representation of application performance.
-
Adjusting the virtual user count allows you to determine an application's scalability limits. Identifying the point at which performance starts to degrade or become unstable aids in making informed decisions about resource allocation and infrastructure requirements.
-
Monitoring performance metrics as the virtual user count changes helps you detect performance bottlenecks, memory leaks, or other issues that might not be apparent under consistent conditions.
-
By gradually increasing the number of virtual users, you can stress the application to its limits, uncovering how it behaves under extreme conditions. In this way, you can gauge the potential impact of sudden spikes in user traffic or unexpected surges.
-
By varying the number of users, you can validate load-balancing algorithms and configurations.
-
Dynamic concurrent user testing is critical for capacity planning.
To change the number of users during load testing, follow these steps:
-
On the main menu, click the Performance tab.
-
Click Create Test and Performance Test.
-
On the Test Configuration page, turn on the Change the number of users at run time toggle.
If a test only has a multi-thread group JMX script uploaded, the Change the number of users at run time toggle does not appear in the LOAD CONFIGURATION section. If multiple JMX scripts are uploaded (for example, one with a single thread group and one with multi-thread groups), the Change the number of users at runtime toggle behaves differently. This toggle is disabled when the multi-thread group script is the active test but enabled when the single-thread group script is the active script. -
Start a test.
-
In Reports, click Run Time Control.
This button is visible only after the test starts to run.
-
Click Change Number of Users.
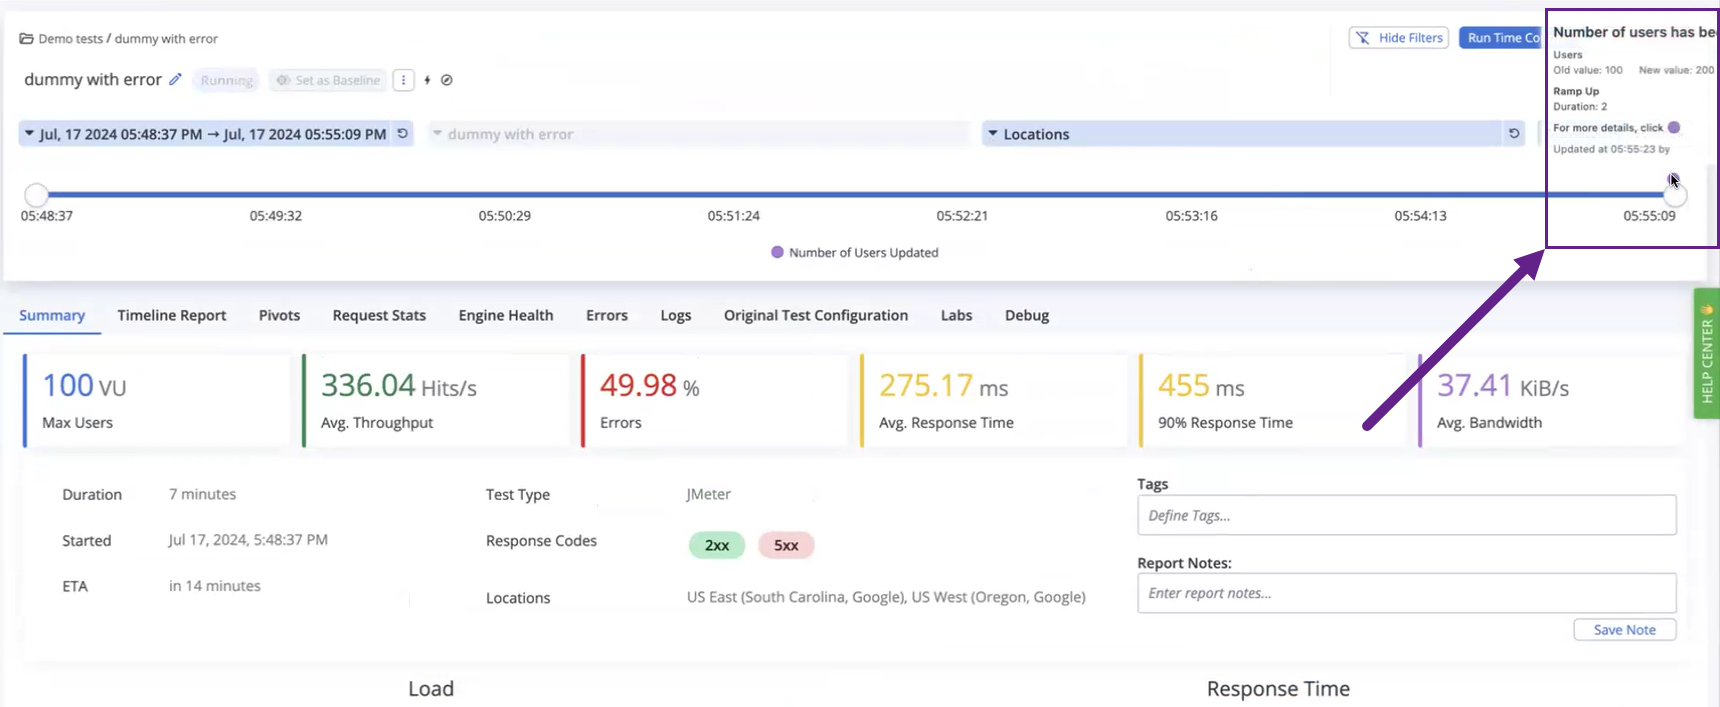
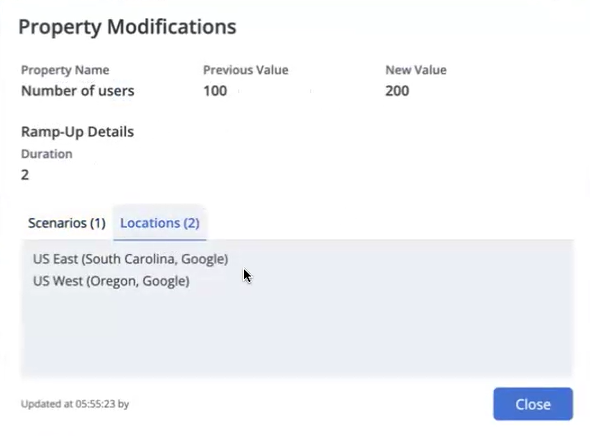
A dialog box appears where you can change the number of users, ramp up time, and number of steps. In this example, the number of users is changed from 100 to 200 and the ramp-up time is set to 2 minutes.
When updating these settings, you cannot exceed your plan limits. -
Set new values and click Apply.
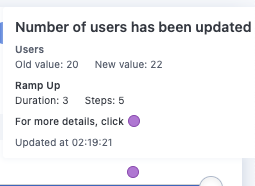
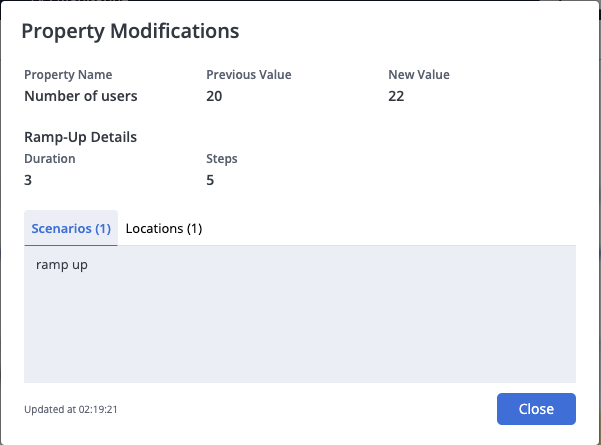
The Summary (or Request Stats) report displays the time and details of the changes.
-
To see more details of the property changes, click the purple circle icon:
