Create your first virtual service

The full set of configuration options is available when you create a virtual service from the Virtual services page. To learn more, see Creating a virtual service.
To create your first virtual service:
- Log in to BlazeMeter and click the Service virtualization tab.
-
Obtain a file that contains transactions to include in your virtual service, for example, in JSON, YAML, HAR, WSDL, in OpenAPI format. To learn more about supported file formats, see Add transactions from file.
- Go to the Asset catalog at the top of the page.
- Drag the transactions file into the upload area, or click the area to browse and find the file you want. To upload multiple OpenAPI files in a zip archive, name the main file in the zip file
index.jsonorindex.yaml.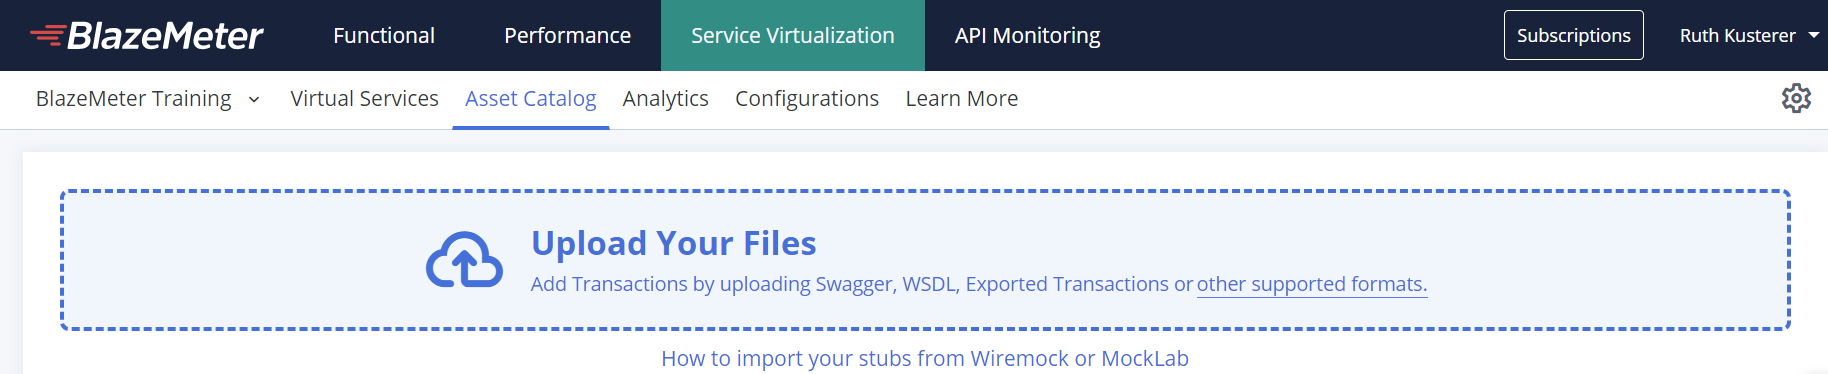
The Virtual services page opens. The first virtual service that you see listed was newly generated from the file you uploaded. - Click the arrow next to the virtual service name to expand the details for the virtual service.
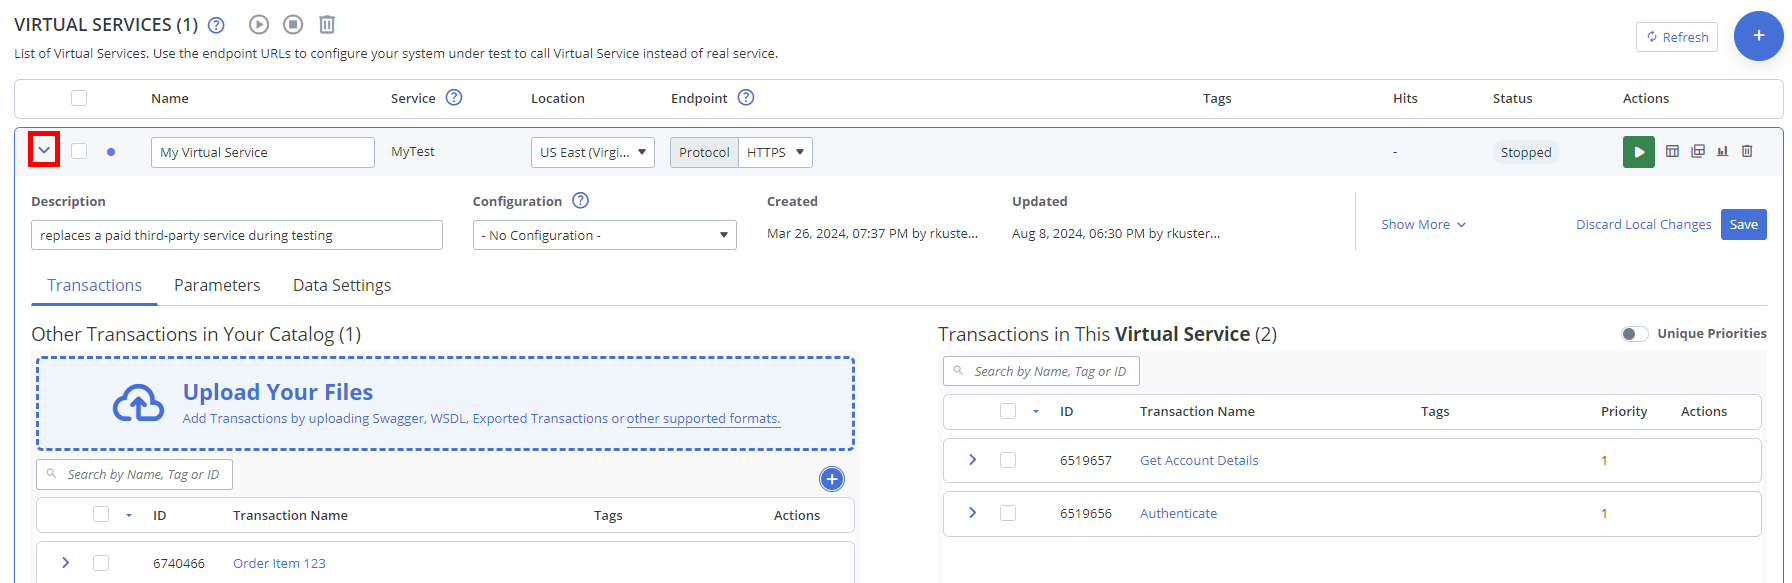
- In the Name field, enter a name for the virtual service or keep the generated default name.
- In the Service drop-down, leave the default selection. A virtual service created by the wizard automatically creates a service container for you. To learn more about this container, see Create a service.
- From the Location drop-down, select the geographical location where you want to deploy your virtual service. For example, select one of the Google cloud platform locations. For an alternative, see also Run virtual services on private locations.
- From the Protocol drop-down, select either HTTPS or HTTP . The default is HTTPS.
Next, add transactions and configure the virtual service. Creating a virtual service from the "Learn more" wizard automatically adds all transactions from your uploaded file to the virtual service.
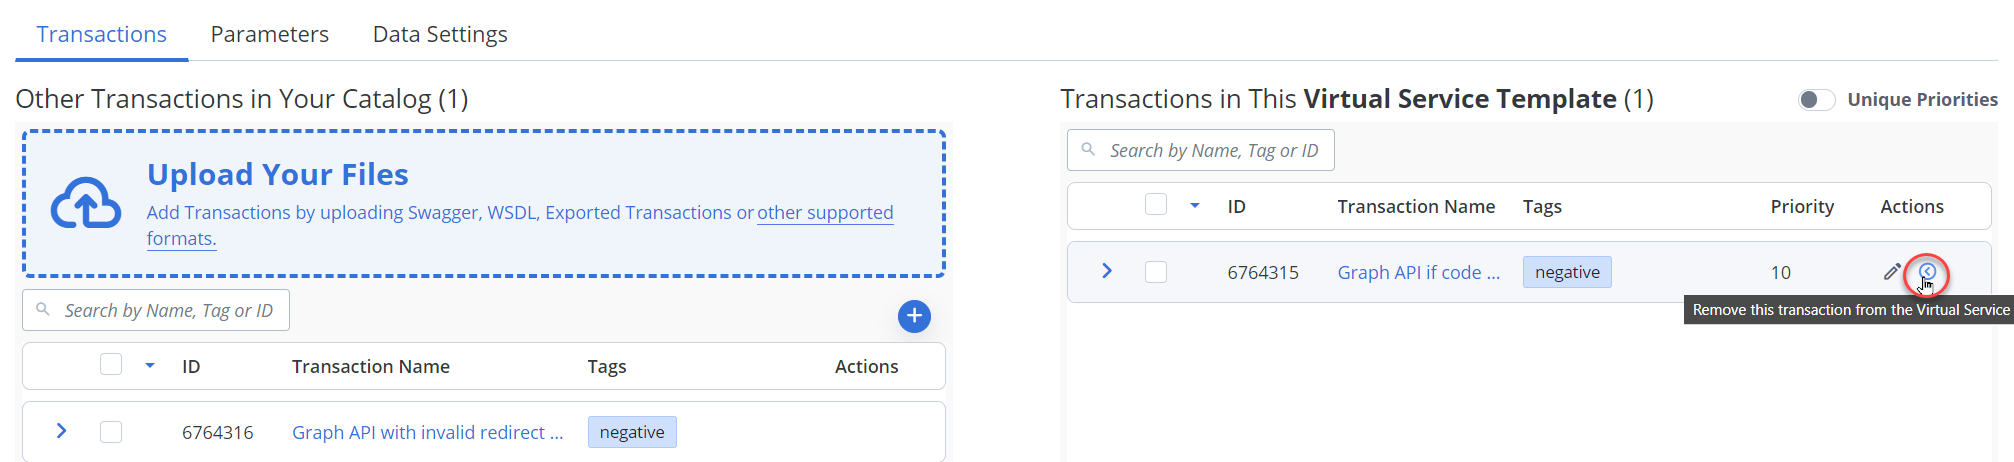
- Click the Virtual services > Transactions tab.
To enable transactions, move them to the right pane. To disable them, move them to the left pane.Use a quick action to move transactions from one column to the other: Click the Include this transaction in the virtual service icon in the left column or the Remove this transaction from the virtual service icon in the right column.
Click to enlarge the screenshots: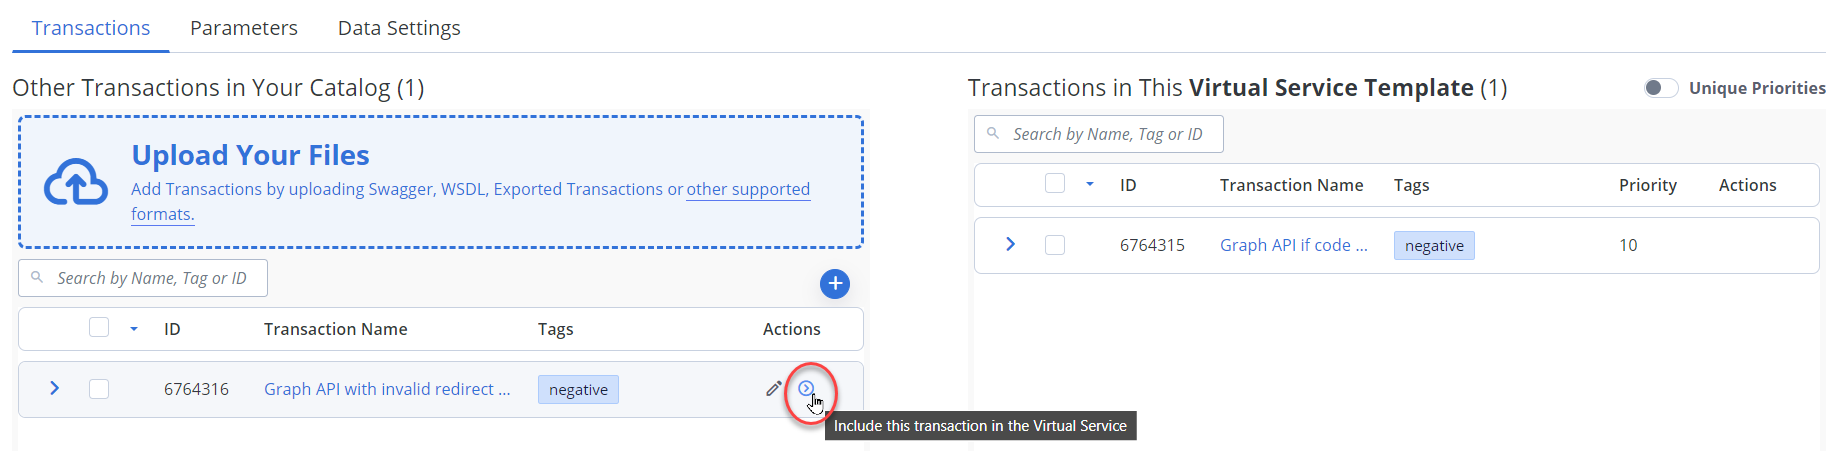
- Click the Virtual services > Parameters tab.
- In the No matching requests field, choose what to do when a request against the virtual services does not match any of the provided transactions. The request can either throw an error or be redirected to the live service. To learn more, see Redirect to live system endpoint.

- Leave all other defaults for now and click Save.
Your first virtual service is created and available on the Virtual services page.
Now, run the virtual service to activate the virtual endpoint and run tests against it!