Chrome extension - record
The BlazeMeter Chrome extension allows you to test your web application without prior scripting knowledge, by recording user actions and HTTP requests to create a unique test artifact that runs both JMeter and Selenium tests.
Recording a test with the Chrome extension is one way to create Objects for the Test Action Library when you Create Scriptless GUI Functional Tests.
On this page:
What can the extension do for you?
The BlazeMeter Chrome extension automatically records performance and functional tests in parallel, and creates both JMeter and Selenium scripts that run locally or directly on BlazeMeter.
Let’s review the recording options available while you're working with the extension:
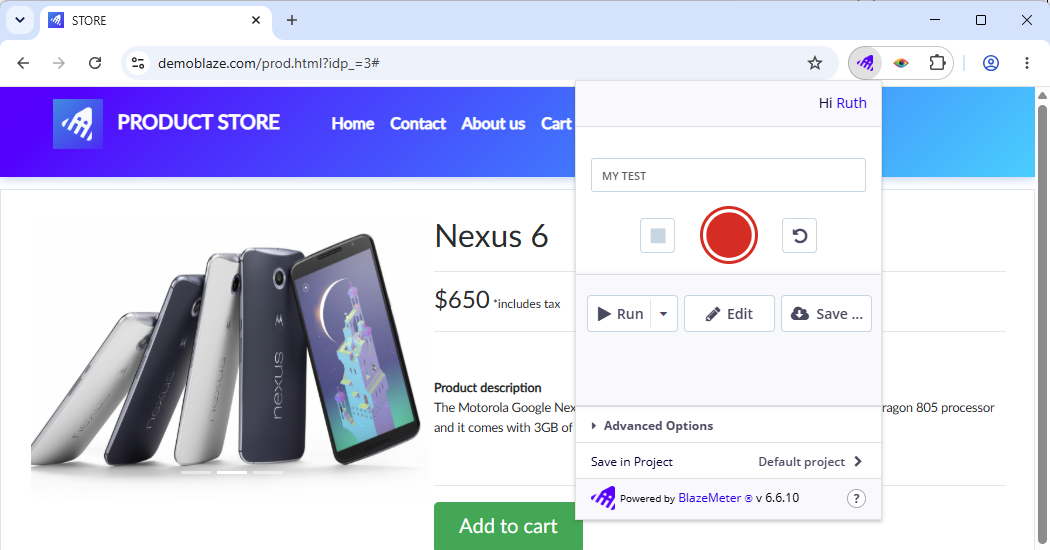
- ENTER THE NAME OF THE TEST - Type the desired name of your test in this required field.
- Start recording (red circle icon) - Starts recording both HTTP(s) requests and Selenium actions for the test.
- Stop recording (red square icon) - Stops recording the test.
- Reset all options (backwards arrow icon) - Resets everything, discarding any recording and settings, and reverting the menu to its default state as it was when you first opened it.
- Run - This button is first disabled and is enabled after you have stopped the recording. Click it to choose how to upload and run the script on BlazeMeter:
- Performance Test
- GUI Functional Test
- End User Experience Monitoring
- Edit - This button is first disabled and is enabled after you have stopped the recording. Use the JMeter Editor in case you need make small fixes before uploading the script.
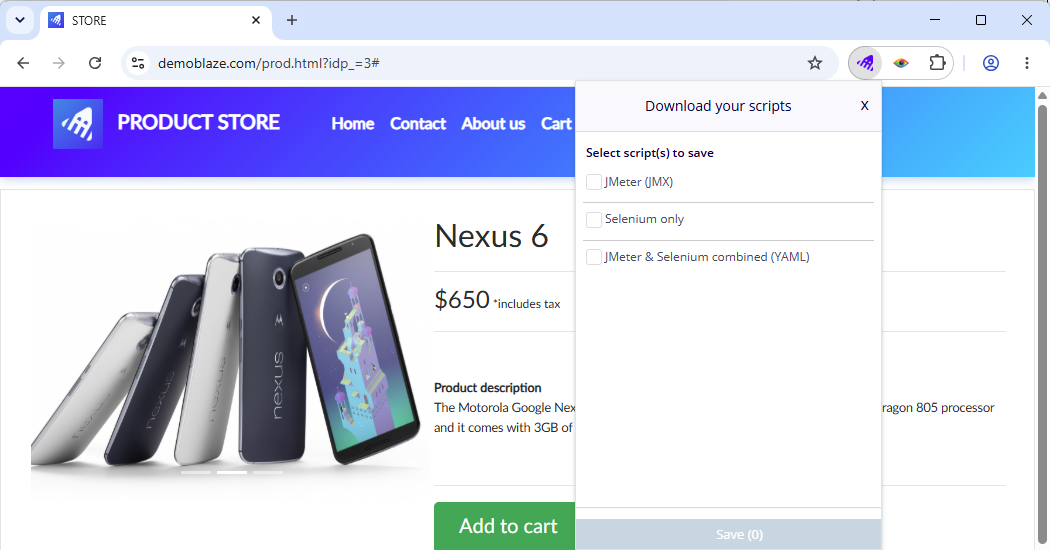
- Save... - This button is first disabled and is enabled after you have stopped the recording. Choose as what type of script you want to download the recording:
- Taurus YAML of JMeter & Selenium - for Load tests and UX tests combined
- Selenium only - for UX tests only
- JMX - for Load tests only
- Save in Project... - Before you run or save the recording, select the BlazeMeter account, project, and workspace, where you want to save the test.
The above options are all you need to record a simple script. There are additional advanced options available when needed.
Advanced options
These Advanced Options are specific to HTTP(S) calls. Scroll down to view all options in this section.
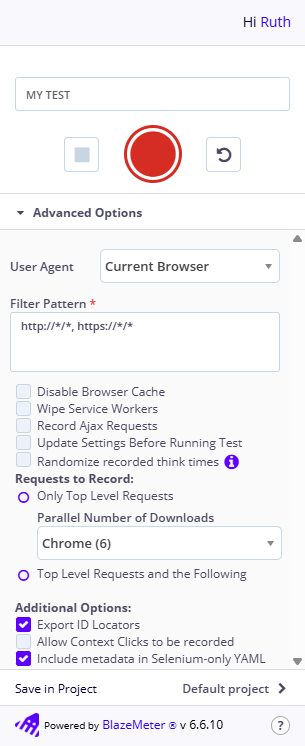
- User Agent - Select your preferred User Agent, meaning, which device or browser your users are using. This selection adds a “User-Agent” header to the requests, and it allows you to emulate various situations, such as a user browsing via a mobile device.
- Filter Pattern - By default, requests are not filtered (the asterisk include all domains and paths). By modifying the match pattern in this field you can change which requests your recording includes. For example, you likely do not wish to record your Gmail, Facebook, or even BlazeMeter traffic. Typically you use this option to restrict requests to only one domain. You’ll be presented with the option to select which domains to include and exclude before the test actually runs.
Default: http://*/*, https://*/*
Format: Refer to Google’s guide on creating match patterns. - Disable Browser Cache - Disables the browser cache during the recording. This option is important since cached objects are not recorded.
- Wipe Service Workers - Removes the service workers of the page every time you navigate to another page while recording.
- Record AJAX Requests - Enable this option if the site uses AJAX which needs to be included in the recording.
- Update Settings Before Running Test - Enable this option to change test settings before running. Through the BlazeMeter interface, you can control properties such as ramp-up time, test duration, load distribution between engines, and much more.
- Randomize recorded think times - Enable this option to use a uniform random timer to simulate the expected delayed response time of a real service or human user.
- Requests to Record - Lets you control how BlazeMeter handles embedded objects on the page, such as images, CSS, and JavaScript files.
- Only Top-Level Requests - If selected, the recorded script will not include requests for referenced objects. When the JMeter script is executed, it will parse the HTML file and send requests for all referenced objects.
- Parallel Number of Downloads - For each browser, enter a number of downloads that are allowed to run in parallel.
-
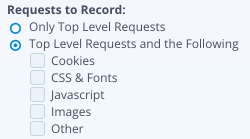
Top Level Requests and the Following - This option offers a selection of objects that can be included. The recorded JMeter script will include requests for referenced objects. When executed, the script does not parse the HTML file and likewise does not send requests for referenced objects. Here is an example of the choices that appear once this option is selected:
- GUI Functional Test Options
- Export ID Locators - If the identifiers in your user interface are static, enable this option. This is the default. Examples of such locators of DOM elements are "ID a1234567" or "Xpath div[id=a1234567]".
If identifiers in your user interface may be regenerated and are not uniquely reliable for use in test scripts, disable this option. Disabling this option excludes ID locators from the recording.
The option is applied as long as you enable it before you export and run the script in BlazeMeter, meaning, you can still enable it after recording. - Allow Context Clicks to be recorded - By default, this option is disabled and the recording does not contain right mouse button clicks right before assertions; this is to exclude clicks where the tester is using the Chrome extension's context menu to add an assertion. If you want these right clicks to be recorded, enable this option.
- Export ID Locators - If the identifiers in your user interface are static, enable this option. This is the default. Examples of such locators of DOM elements are "ID a1234567" or "Xpath div[id=a1234567]".
Now that we’ve outlined all of the available options, let’s walk through creating a simple recording.
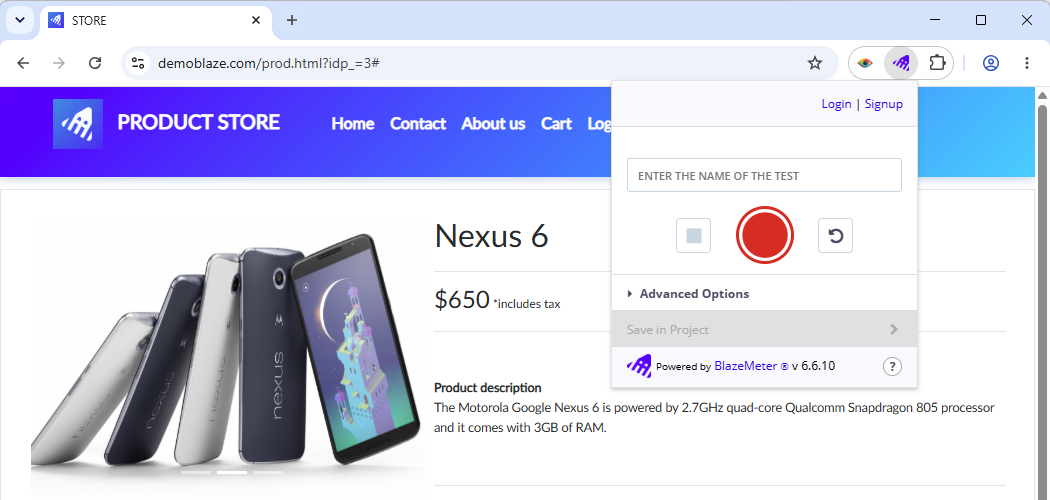
Log in and name your test
- Click the BlazeMeter icon in your Chrome browser toolbar:

- Log in to your BlazeMeter account if you haven’t already. Verify that you see the “Hi [username]” greeting in the upper right-hand corner to confirm that the extension is logged in.
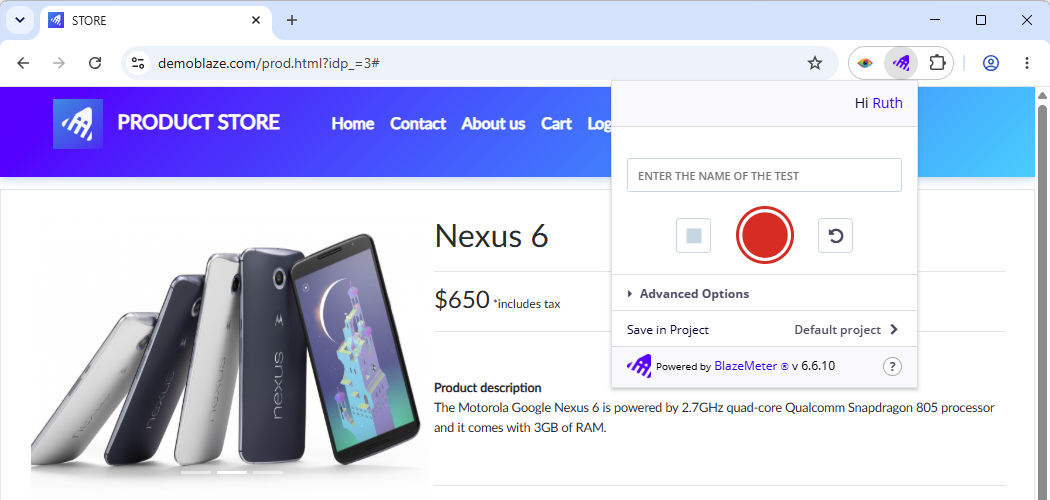
- Give your test a name.
- (Optional) Expand and configure advanced options, or use the defaults.
- Under Save in Project, select the BlazeMeter account, project, and workspace where you want to save the test.
Record a test
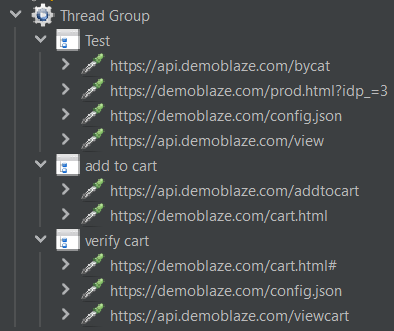
By default, every test step you perform is being recorded to a “Test Case”, and it will be a monolithic script with a sequence of actions. On the JMX level, this will simply create a thread group consisting of these actions. The recorder, in fact, treats each step as a single transaction controller, so if you prefer, rename the label, and add additional labels to group subsequent actions under their own transaction controllers.
- Click the Start recording button.
The extension UI changes to record your test steps. Note that on the right-hand side, there is now a UI column that starts counting at 2, and a JMX column that starts counting at 0.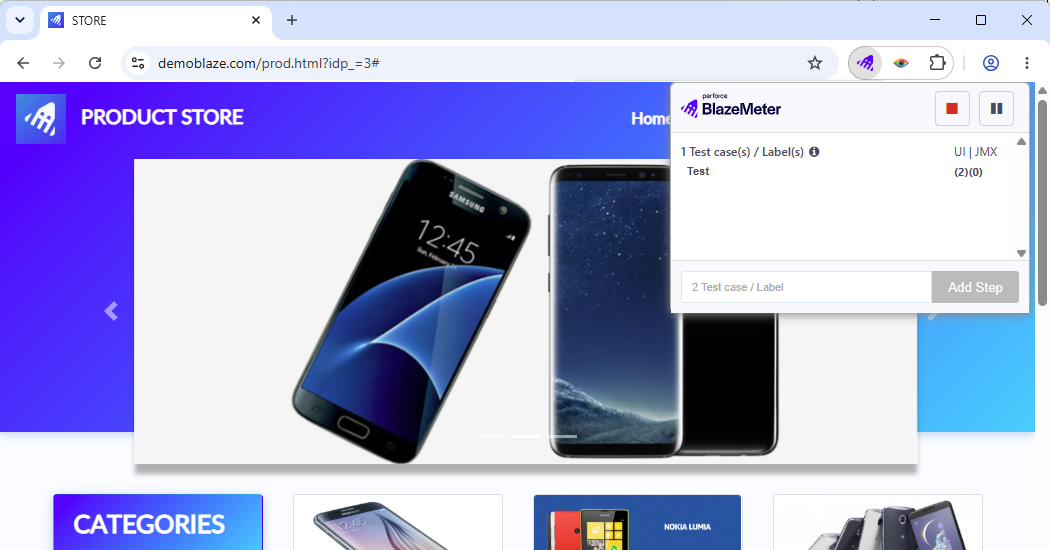
- Perform the actions in your web application that you wish to simulate in your test.
For example, browse to the website, select items, fill out a form, submit the form.- Note that as you do so, the UI count increases to reflect UI actions that you performed on a user-level.
- The JMX count increases to reflect how many items are created within the performance script to do the same. *
- (Optional) Rename a segment by clicking the label. Or type in a name, then click Add Step to create a new label under which to group sets of subsequent actions for readability later.
The example above will appear as follows in the resulting JMX: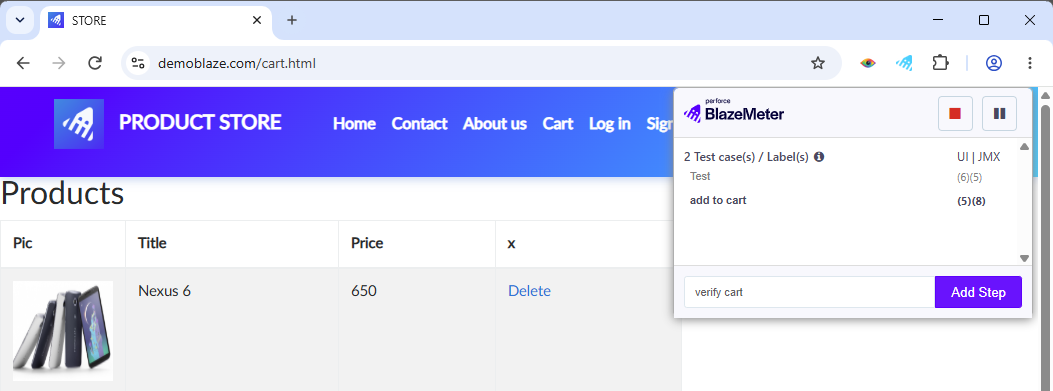
- Use the Pause recording button at any time to pause the recording.
The Pause button changes to Record. Clicking it a second time unpauses it, resuming the recording. - To add assertions, pause the recording, then select and right-click any element on your website to add assertions as test steps. For each added assertion, the UI count increments by one.
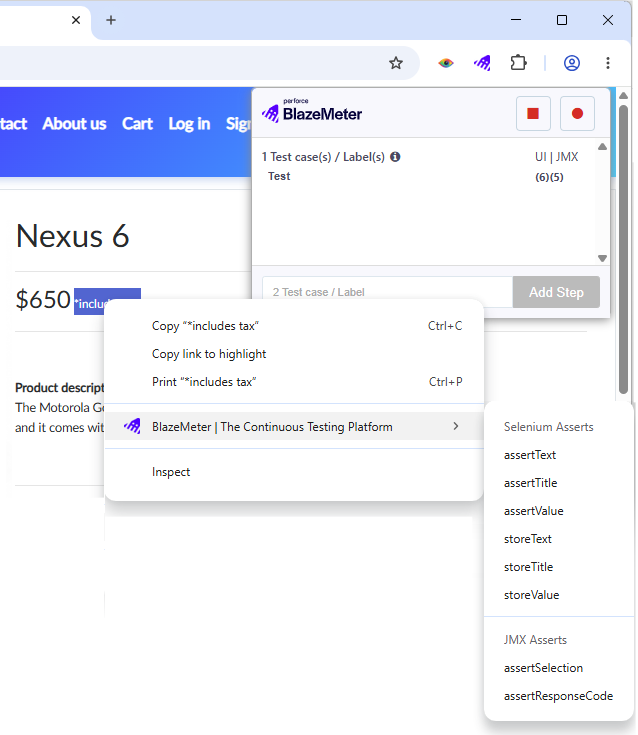 Only add assertions while the test is paused, else the recorder will also record the clicks you have performed to open the context menu.
 - When finished, click the Stop recording button.
Now you are ready to either download (save), edit, or run the test in the cloud.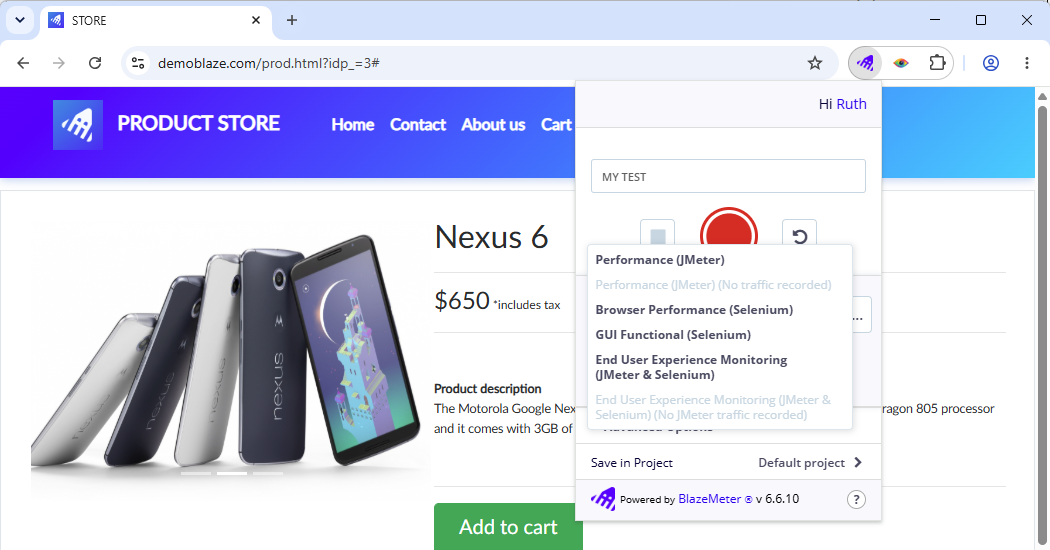
How multi-tab recording for Selenium scripts works
When recording a Selenium scenario, the BlazeMeter Chrome extension takes into account the following scenarios:
- When you open a new tab, the Chrome extension adds an "openWindow" action to your script recording with the default new tab URL of Chrome. The Chrome extension remembers this tab and the focus of recording switches to this tab using the "selectWindow" command.
- When you switch to an existing tab, the "openWindow" action is recorded together with the current URL of that tab. The Chrome extension remembers this tab and the focus of recording switches to this tab using the "selectWindow" action.
- When you close a tab, the "close" action is recorded, then the browser automatically switches to another existing tab. Then it follows the described behavior for switching to existing tabs.
- When you switch between tabs that have already been part of the recording, the Chrome extension does not add another "openWindow" action because it recognizes the tab. Instead, only the "selectWindow" action is added to the recording.
BlazeMeter script editor
Instead of downloading the recording as-is, you may wish to further edit your script. You have the following options:
- Load Testing: Edit your script for JMeter
- Functional Test: Edit your script for Selenium
Click Edit to open the JMeter script editor in a new tab.
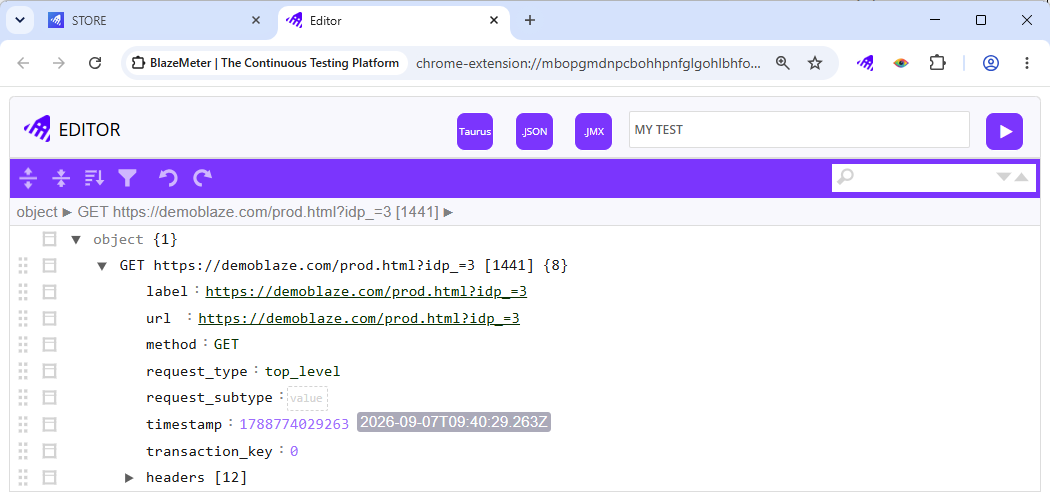
Use the topmost three buttons to select in which format to export your script:
-
Taurus YAML file
-
Taurus JSON file
-
JMeter JMX file
Use the buttons in the menubar to perform the following tasks:
- Expand all fields
- Collapse all fields
- Sort the contents
-
Filter the contents
In the filter, enter a JMESPath query to filter, sort, or transform the JSON data, and preview it.
- Undo
- Redo
- Search
To the left of each item is a handle button that you can click and drag to move the item up or down in the script.
Next to the handle is a button that opens a menu for customizing your script:
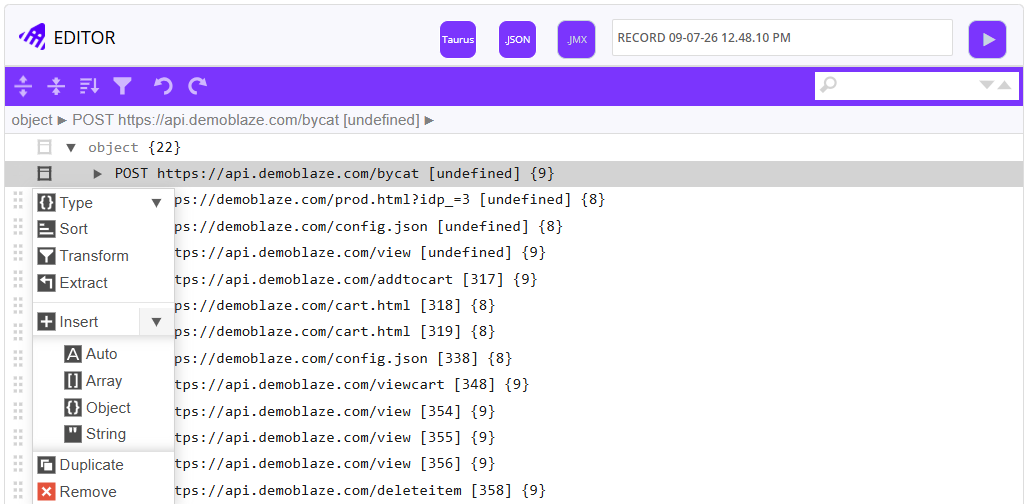
Lastly, use the Run button in the upper-right corner to run your edited script in BlazeMeter.
Download the recording
After your script is recorded, you can choose to click Save... in the Chrome extension to download a copy of the recording.
You will be prompted to select the desired type of the exported recording.
- A JMeter-only JMX script.
- A Taurus YAML script consisting of only a Selenium test.
- A Taurus YAML script containing both, JMeter and Selenium tests.
If you selected additional options for Requests to Record earlier, you will be prompted to select additional options pertaining to which domains to include in the exported script.