Managing an account
As the initial account Owner, you are the Admin. A BlazeMeter Account is created automatically once you sign up to BlazeMeter with your Admin account. After you have configured security settings, you invite additional users to the Account, assign different account and workspace roles to users, add new workspaces, and manage the billing settings. If you are an enterprise customer using SSO to control roles, see also SAML SSO Integration.
- Invite users to a BlazeMeter account
- Change a user's account roles
- Remove users from a workspace
- Add a new workspace to the account
- Customize your account name and logo
- Delete an account
Invite additional users to a blazemeter account
Follow these steps:
-
Click the 'Invite Users' icon in the top menu bar:

-
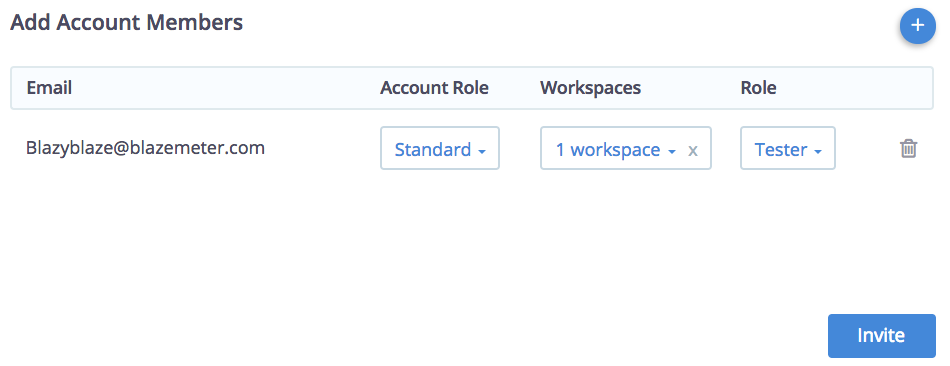
Under 'Add Account Members' do the following:
-
Add the email address of the invitee. It's OK if they already use that email address to access another BlazeMeter account.
-
Assign one of the following Account roles to the invitee.
-
Standard - Has no permissions in the Account's managerial levels.
This is the typical end-user role, such as a Tester or Developer. -
Admin - Same as Standard but can also manage users and workspaces. Limit the number of Account Admins to those that need to see the activity happening in the account, usually executive-level user.
-
Billing - Can only view/change Billing related settings, for example, credits and servers hours allocations. Typically assigned to users from the Finance Team who need to handle the payment of an account, but do not need access to tests, test results, and so on.
-
User Manager - Can only add/remove users & manage permissions to workspaces. Assigned to someone who handles user management on the account level and does not need access to see all the workspaces, tests, and so on.
-
-
- Select workspaces to grant access to and set the initial Workspace role to assign them:
- Viewer - Can only view reports, cannot run or edit tests. This role is typically assigned to users on the executive level, for example, Managers or Directors.
- Tester - Can create/edit/delete/run tests and reports, projects, APM credentials and view Private Locations, Dedicated IPs and Usage Reports. This is the typical end-user role, such as Tester or Developer.
- Manager - Same access as a Tester, but can also add or remove members from the workspace, can create or delete alerts, and can create, edit, or delete Private Locations. This role is typically assigned to a scrum lead or manager that is responsible for everything that falls under that workspace, including the handling of Private Locations.
- Click 'Invite'.
That's it! The new users will receive an email invitation with a link to join the Account. That link will take them to the BlazeMeter home page (or the sign-in page, if the user is not logged in yet). That home page has a little envelope in the top menu bar:
Clicking this envelope allows the user to either accept or decline the invitation.
- Invalid email addresses will be rejected.
- If there is only one workspace in this Account - the user will be automatically added to that workspace.
By design, the email invitation is "signed" by the account owner, no matter which administrator actually sends out the invitation.
Change a user's account roles
The Account admin/owner can assign the following roles to an Account's user:
- Standard - Has no permissions in the account's managerial levels. The typical end-user.
- Billing - Can view/change billing related settings, for example, credits and servers hours allocations
- Admin - Same as billing but can also manage users and workspaces
The Owner role is unique. Only BlazeMeter Support can change who holds the owner role.
- Owner - Single. Same as admin but can also delete the account
To assign roles to users, follow these steps:
- Click the Cog icon
 at the top right of the BlazeMeter UI to open the Settings.
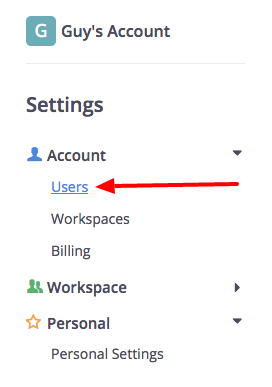
 - Click Account > Users:
- Hover over the user you would like to change the role of and click the 'Edit' button:
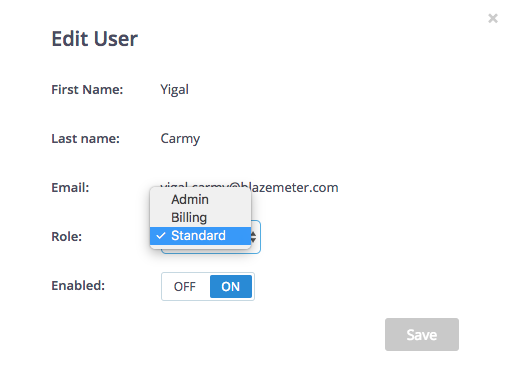
- Select the role you want from the drop-down menu and click on 'Save':
If no Edit button is available, the account is controlled through SSO.
Remove users from a workspace
If a standard, admin, or manager user needs to be removed or replaced, perhaps due to a change in organization, team, role, and so on, remove the user account from the BlazeMeter account.
Users cannot be deleted; however, disabling a user's access to the Account, for all intents and purposes, has the same effect, as a disabled user will no longer have access, nor will they be visible anymore.
When you disable users, they will be removed from the account's users list. Use the 'Show disabled' ON/OFF button to view disabled users.
Add a new workspace to the account
Adding new workspaces is possible only if your plan allows multiple workspaces.
Different workspaces are used to divide teams that work on different independent applications. If you want to share all assets across all users, use just one workspace.
- Log in to your BlazeMeter account. Click the Cog icon
 at the top right of the BlazeMeter UI to open the Settings.
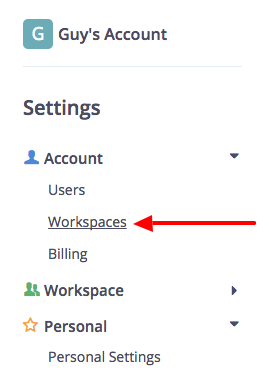
 - Click Account => Workspaces:
- Click plus to open the Create a new workspace dialog.
- Give your workspace a name.
- Choose workspace features such as dedicated IPs and private locations.
- (Optional) Disable the workspace if you don't want it to become available right away. By default, the new workspace is enabled.
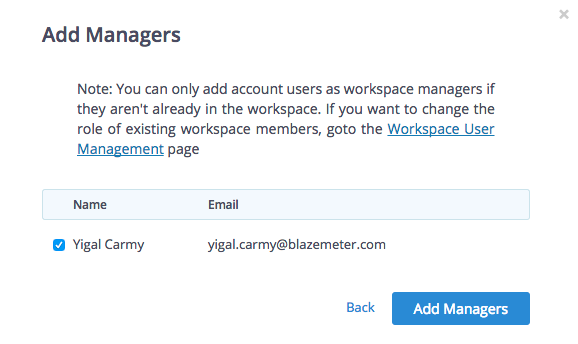
- (Optional) Click the '+' button to add additional managers from the list of existing Account users. Check the user you would like to add as a workspace manager, and click Add managers:
- Click Create workspace.
Customize your account name and logo
As an account owner or manager, you can customize your account name and logo.
Setting a custom account logo will also display the logo in all your account's executive summary reports. If undefined, the default BlazeMeter logo will display.
Follow these steps:
- Log in to your BlazeMeter account. Click the Cog icon
 at the top right of the BlazeMeter UI to open the Settings.
 - Click the pencil icon next to the account name.

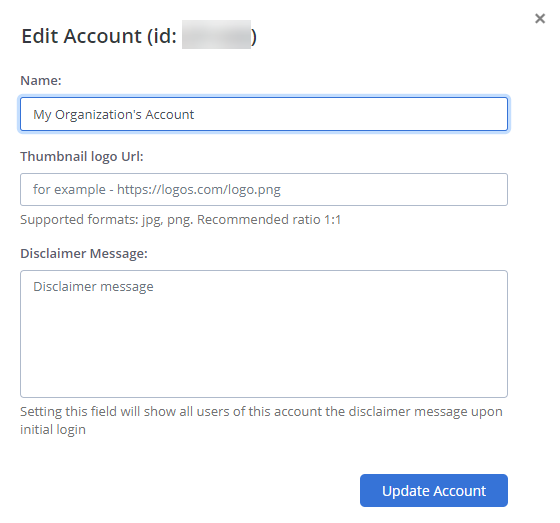
- In the popup wizard, customize your account name. Customize your account logo by entering a logo URL. You can also add a disclaimer message that will display upon initial user login.
- Click Update account.
Delete an account
To delete an account, open a support ticket.
