Edit transactions
When you import files into the transaction repository, the transactions are imported exactly as they appear in the file. You may want to update those transactions, for example by narrowing or broadening the matching criteria. Transactions describe the request and response behavior of a service.
You provide criteria by which a request matches URLs, headers, query parameters, cookies, credentials, or request body, and then a response that the virtual service returns when a match is detected. The request criteria can be a fully formed request, like a valid GET call, or a regular expression that returns a match for multiple potential requests. You can change a direct URL into a regular expression that will match multiple similar requests. Or you can add parameters or other additional matching criteria to a request.
To learn more about matching and strategies for creating requests, see Choose the right request matchers.
Edit the transaction properties
You can edit the transaction from the catalog or in their virtual service.
- In the main menu, navigate to the Service virtualization tab and click either Asset Catalog or Virtual services.
- Click the Open details button to expand a virtual service.
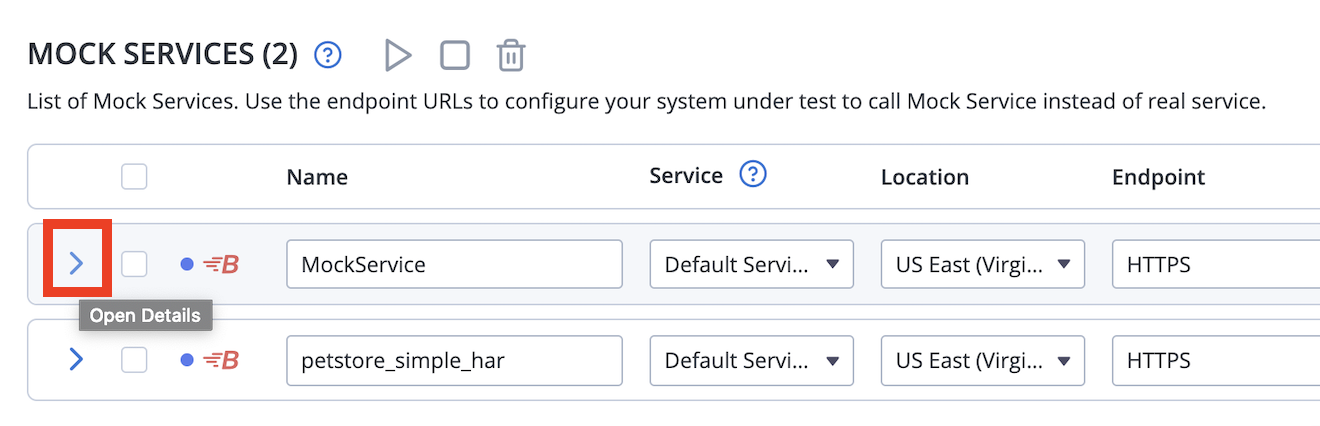
You can see the list of transactions. - Click the Edit transaction button next to the transaction that you want to edit.
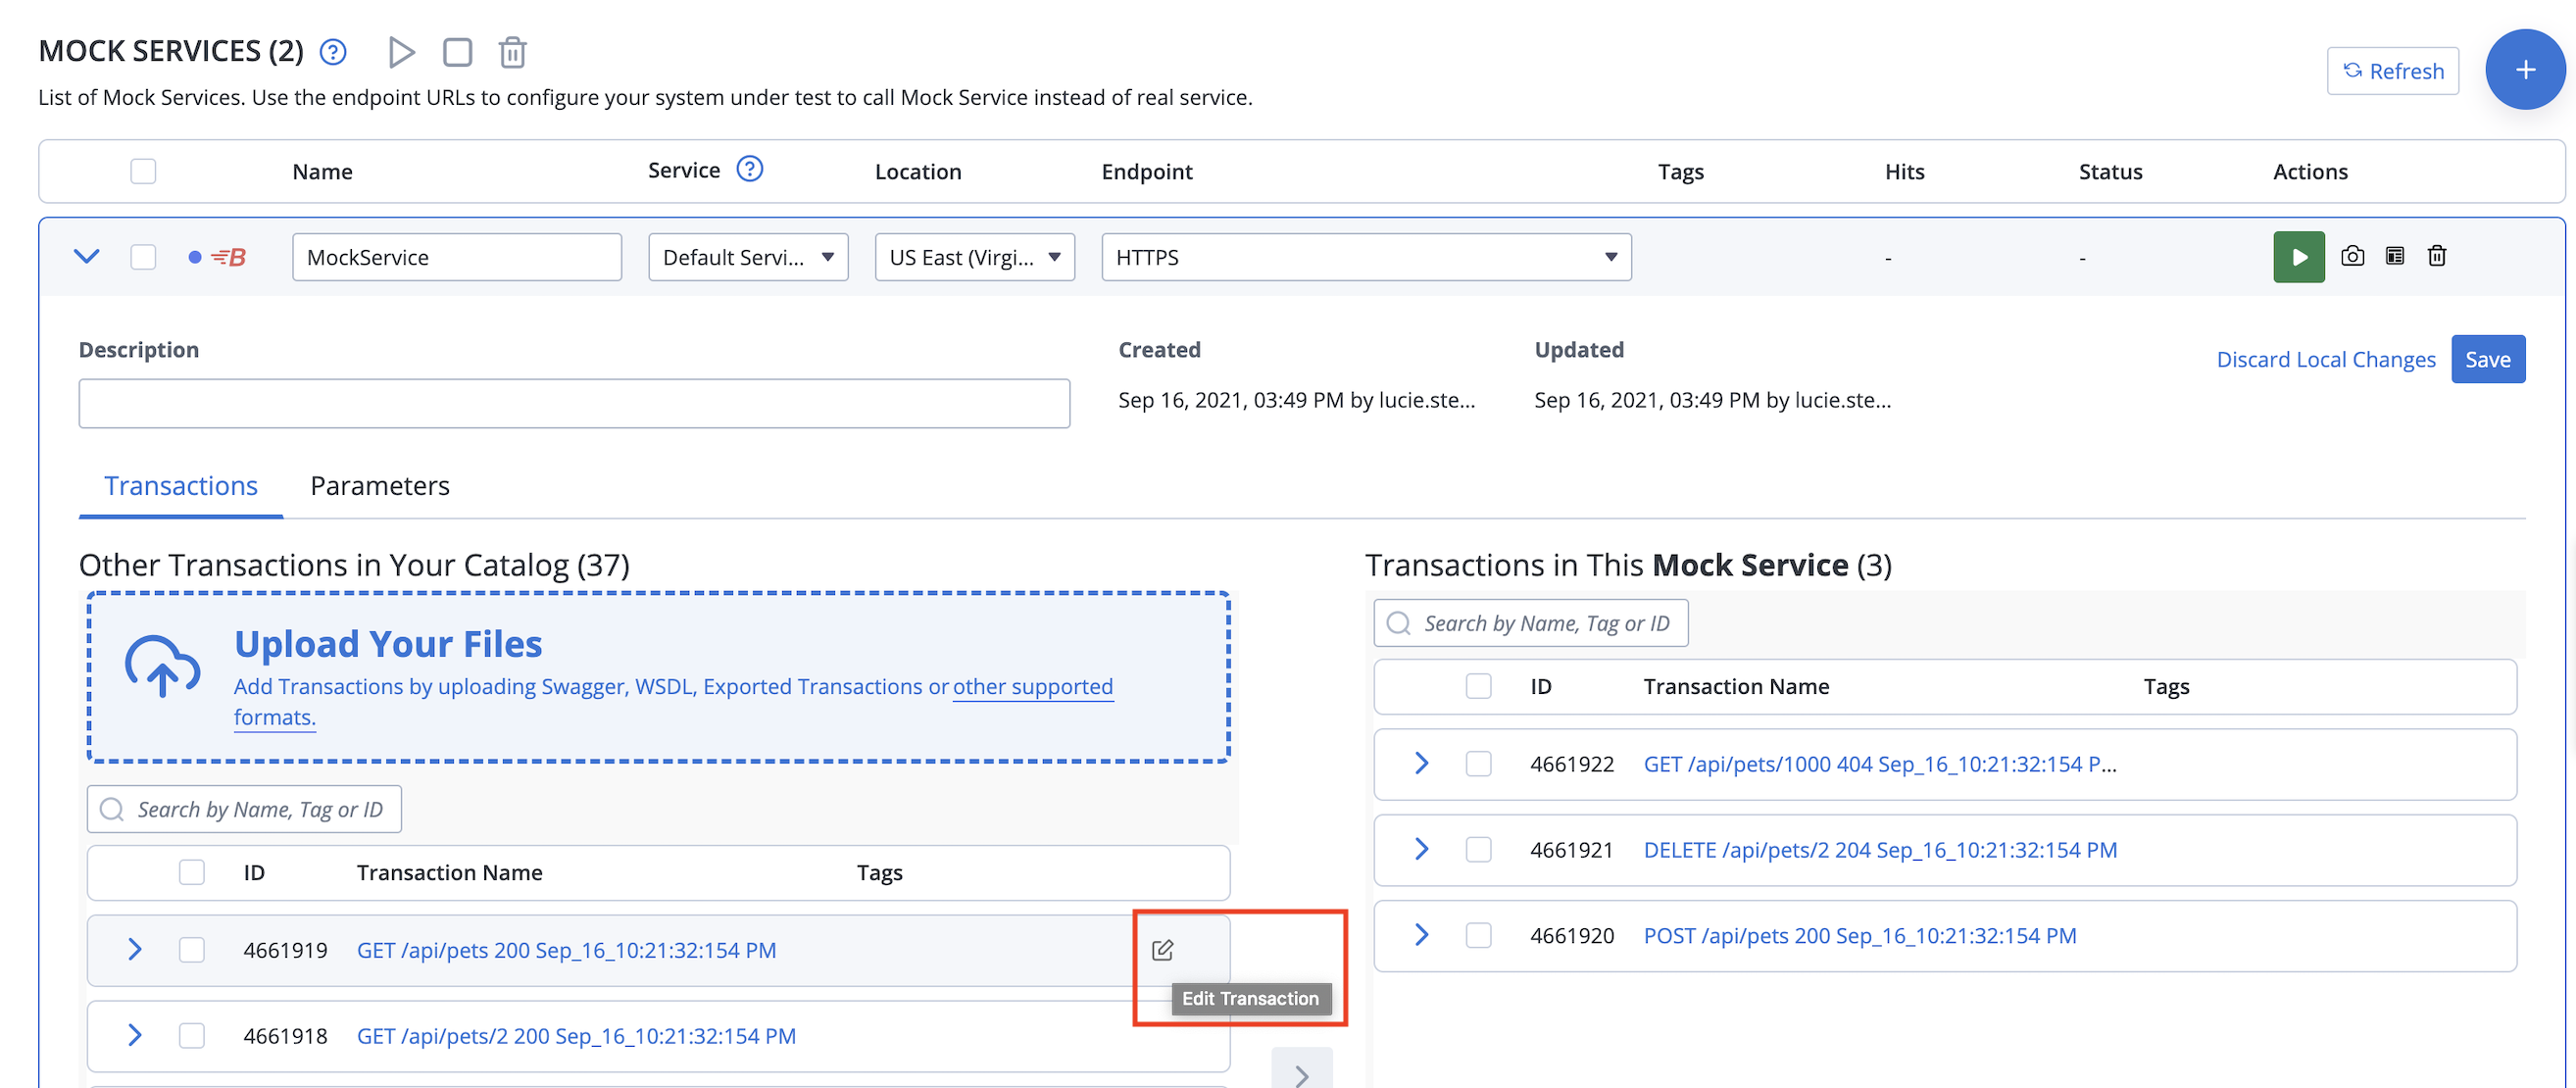
- (Optional) To preserve the transaction before the edit, clone it. See Clone transactions.
- Update Name, Service, and Description as needed.
- To assign tags to transactions, type the tag names in the Tags field and press Enter.
To enter multiple tags, press Enter after each tag name. - In the following tabs, make changes to the Request matcher and Response definitions.
- Click Save.
The updated transaction is saved and available for adding into a virtual service or template.
Configure the request matcher
To learn from detailed help and examples, see Choose the right request matchers.
In the Request matcher tab:
- Select the type of transaction you want to add.
The following transaction types are supported:- GET
- POST
- PUT
- DELETE
- PATCH
- OPTIONS
- TRACE
- HEAD
- CONNECT
- ANY
- Select the proper option on the right of the URL field:
- If you want to match a specific URL, select Equals and enter the URL.
- If you want to broaden or narrow the URL pattern, select Matches regex and enter the regular expression in the URL field.
- Click Add in each of the following tabs to define the behavior of your transaction:
- HeadersAs a best practice, avoid using the "host" header in any request matching criteria, as it can adversely affect transaction matching.
- Query parameters
- Cookies
- Credentials
- Body
equals
equals (case insensitive)
contains text
matches regex
does not match regex
is absent
equals to XML
equals to JSON
matches XPath
matches XPath from CDATA
matches JSON path
WSDL schema validation
- Headers
Configure the response
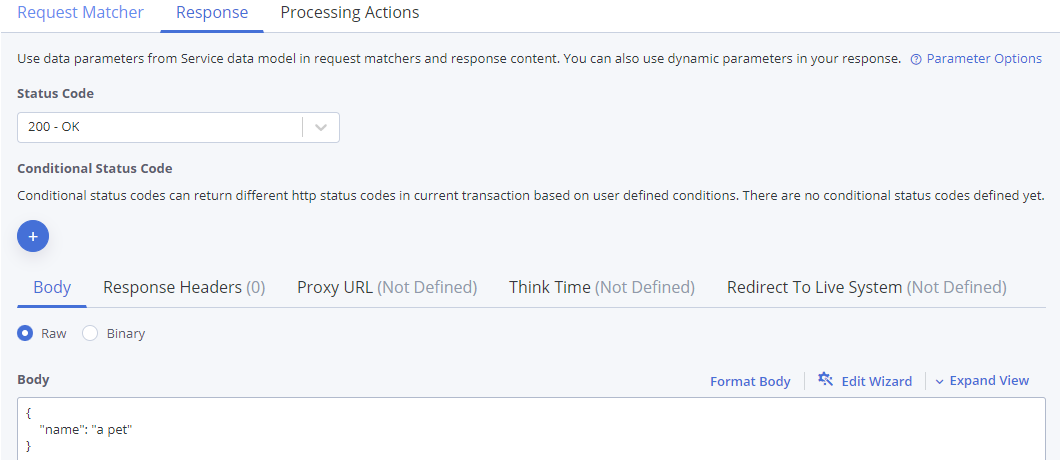
Providing a status code is mandatory, the rest of the values are optional.
In the Response tab:
-
Select the Status code to return when a match occurs. For example, "200 - OK."
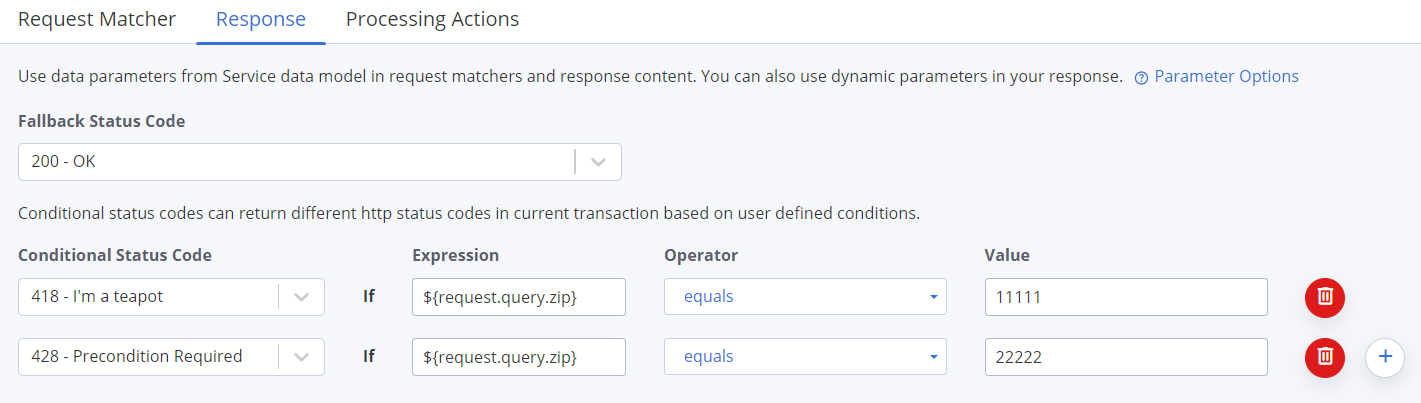
- (Optional) Click the Plus to add one or more Conditional status codes. The previously selected default status code will become the Fallback status code, verify and adjust it if necessary.
Conditional status code
Select a status code that will be returned only when a given condition occurs.Expression
Enter a parameter upon which the condition depends.Operator
Select a comparison operator for the condition:
- equals
- equals (case insensitive)
- contains text
- matches regex
- does not match regex
- equals to JSON
- matches JSON Path
- equals to XML
- matches XPath
- matches XPath from CDATA
- greater than
- less than
Value
Enter the comparison value.
- Enter the full response body in the Body field.
- (Optional) Add Response headers. Use the Edit wizard to define dynamic response values.
- (Optional) Provide Proxy URL values.
- (Optional) Specify a Think time to simulate realistic delays. To learn more, see Simulating irregular response latencies (Think Time).
- (Optional) Under Redirect to live system, define the URL of your Live system endpoint. All requests that match this transaction are conditionally redirected to the specified live system. To learn more, see Redirect to live system endpoint.
- (Optional) Under Faults, configure a network-level simulated fault to return instead of an HTTP response.
- None (Default)
- Empty response
- Random data, then close
- Malformed response chunk
- Connection reset by peer
- (Optional) Under SSL authentication, select an SSL authentication:
No authentication
1-way SSL
2-way SSL
Select an existing Keystore or upload a new one. Provide the Keystore password and the password used to access individual keys in the keystore.
(Optional) To define how to identify during SSL/TLS communication using an alias for aprivate key entrydefined in your keystore, select the Alias and provide an Alias password. - Click Save.